Configuring the application
- Open the project directory in finder. You can do this with the following command
open .. -
Then double click the
QuickstartWorkspace.xcworkspacefile to open the project in Xcode - In Watson Studio, make your way back to your project’s Assets tab.
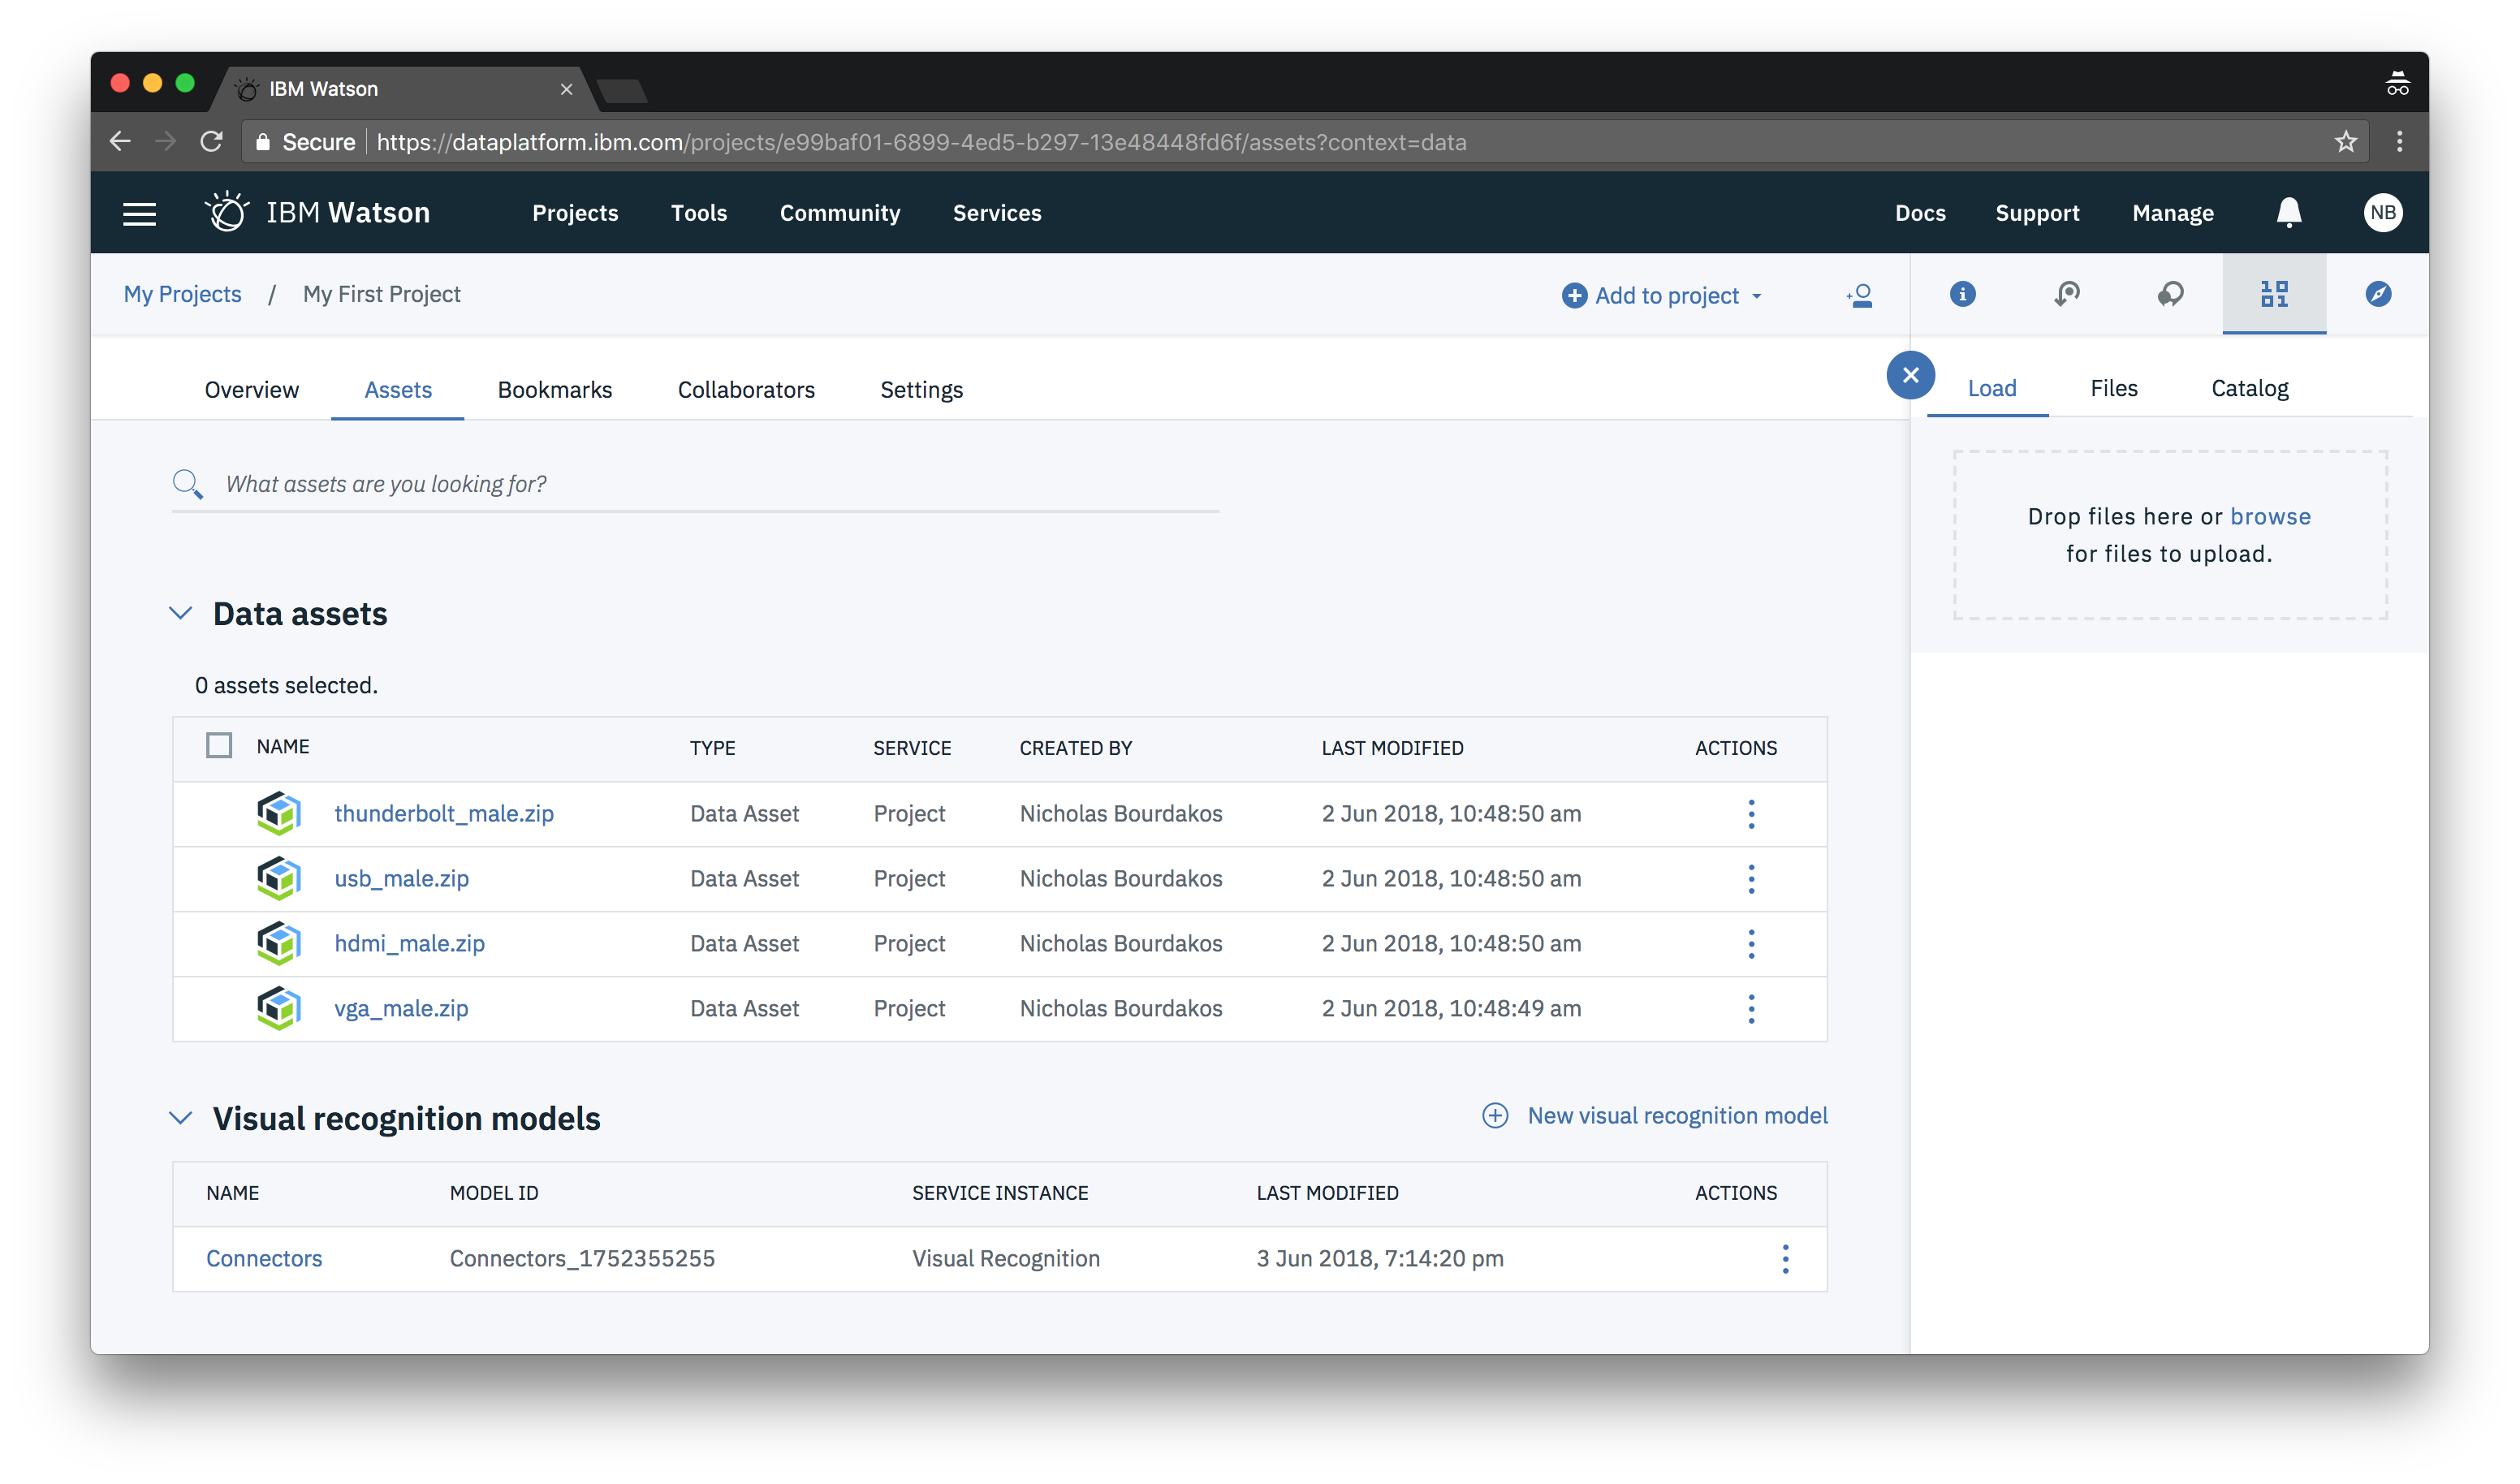
- Then open each of your models and copy the Model ID. Keep this handy for later.
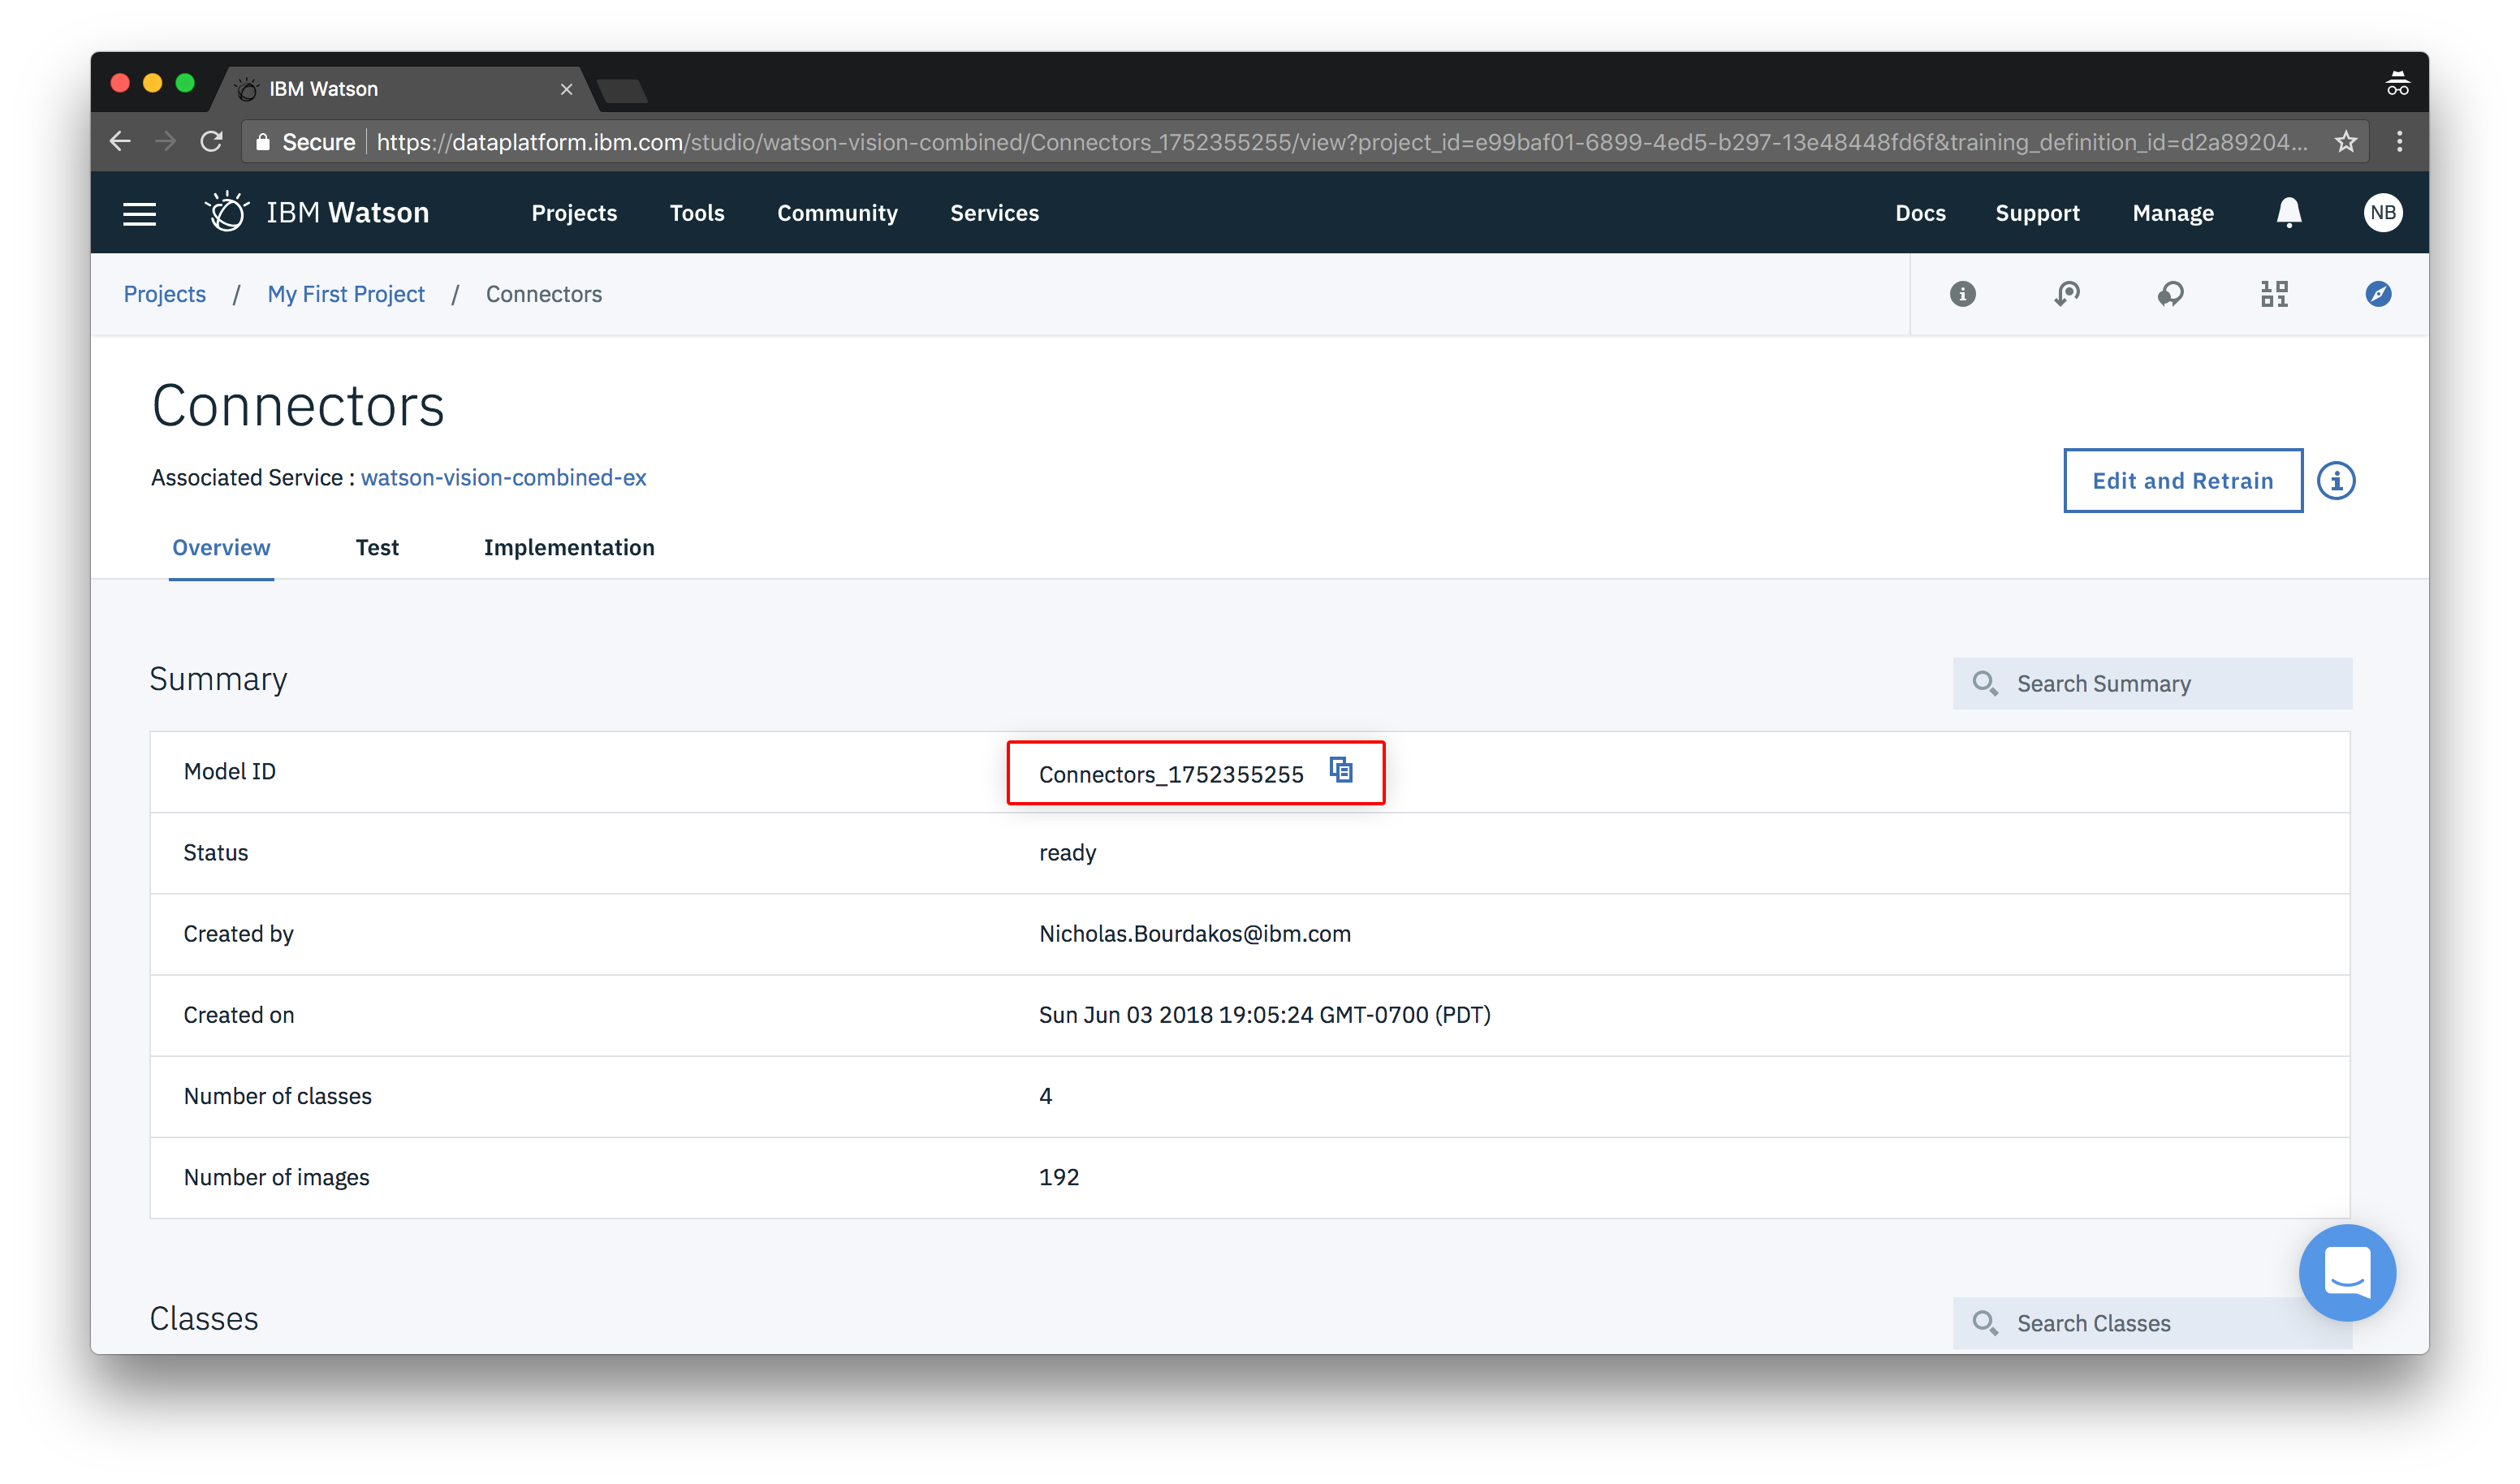
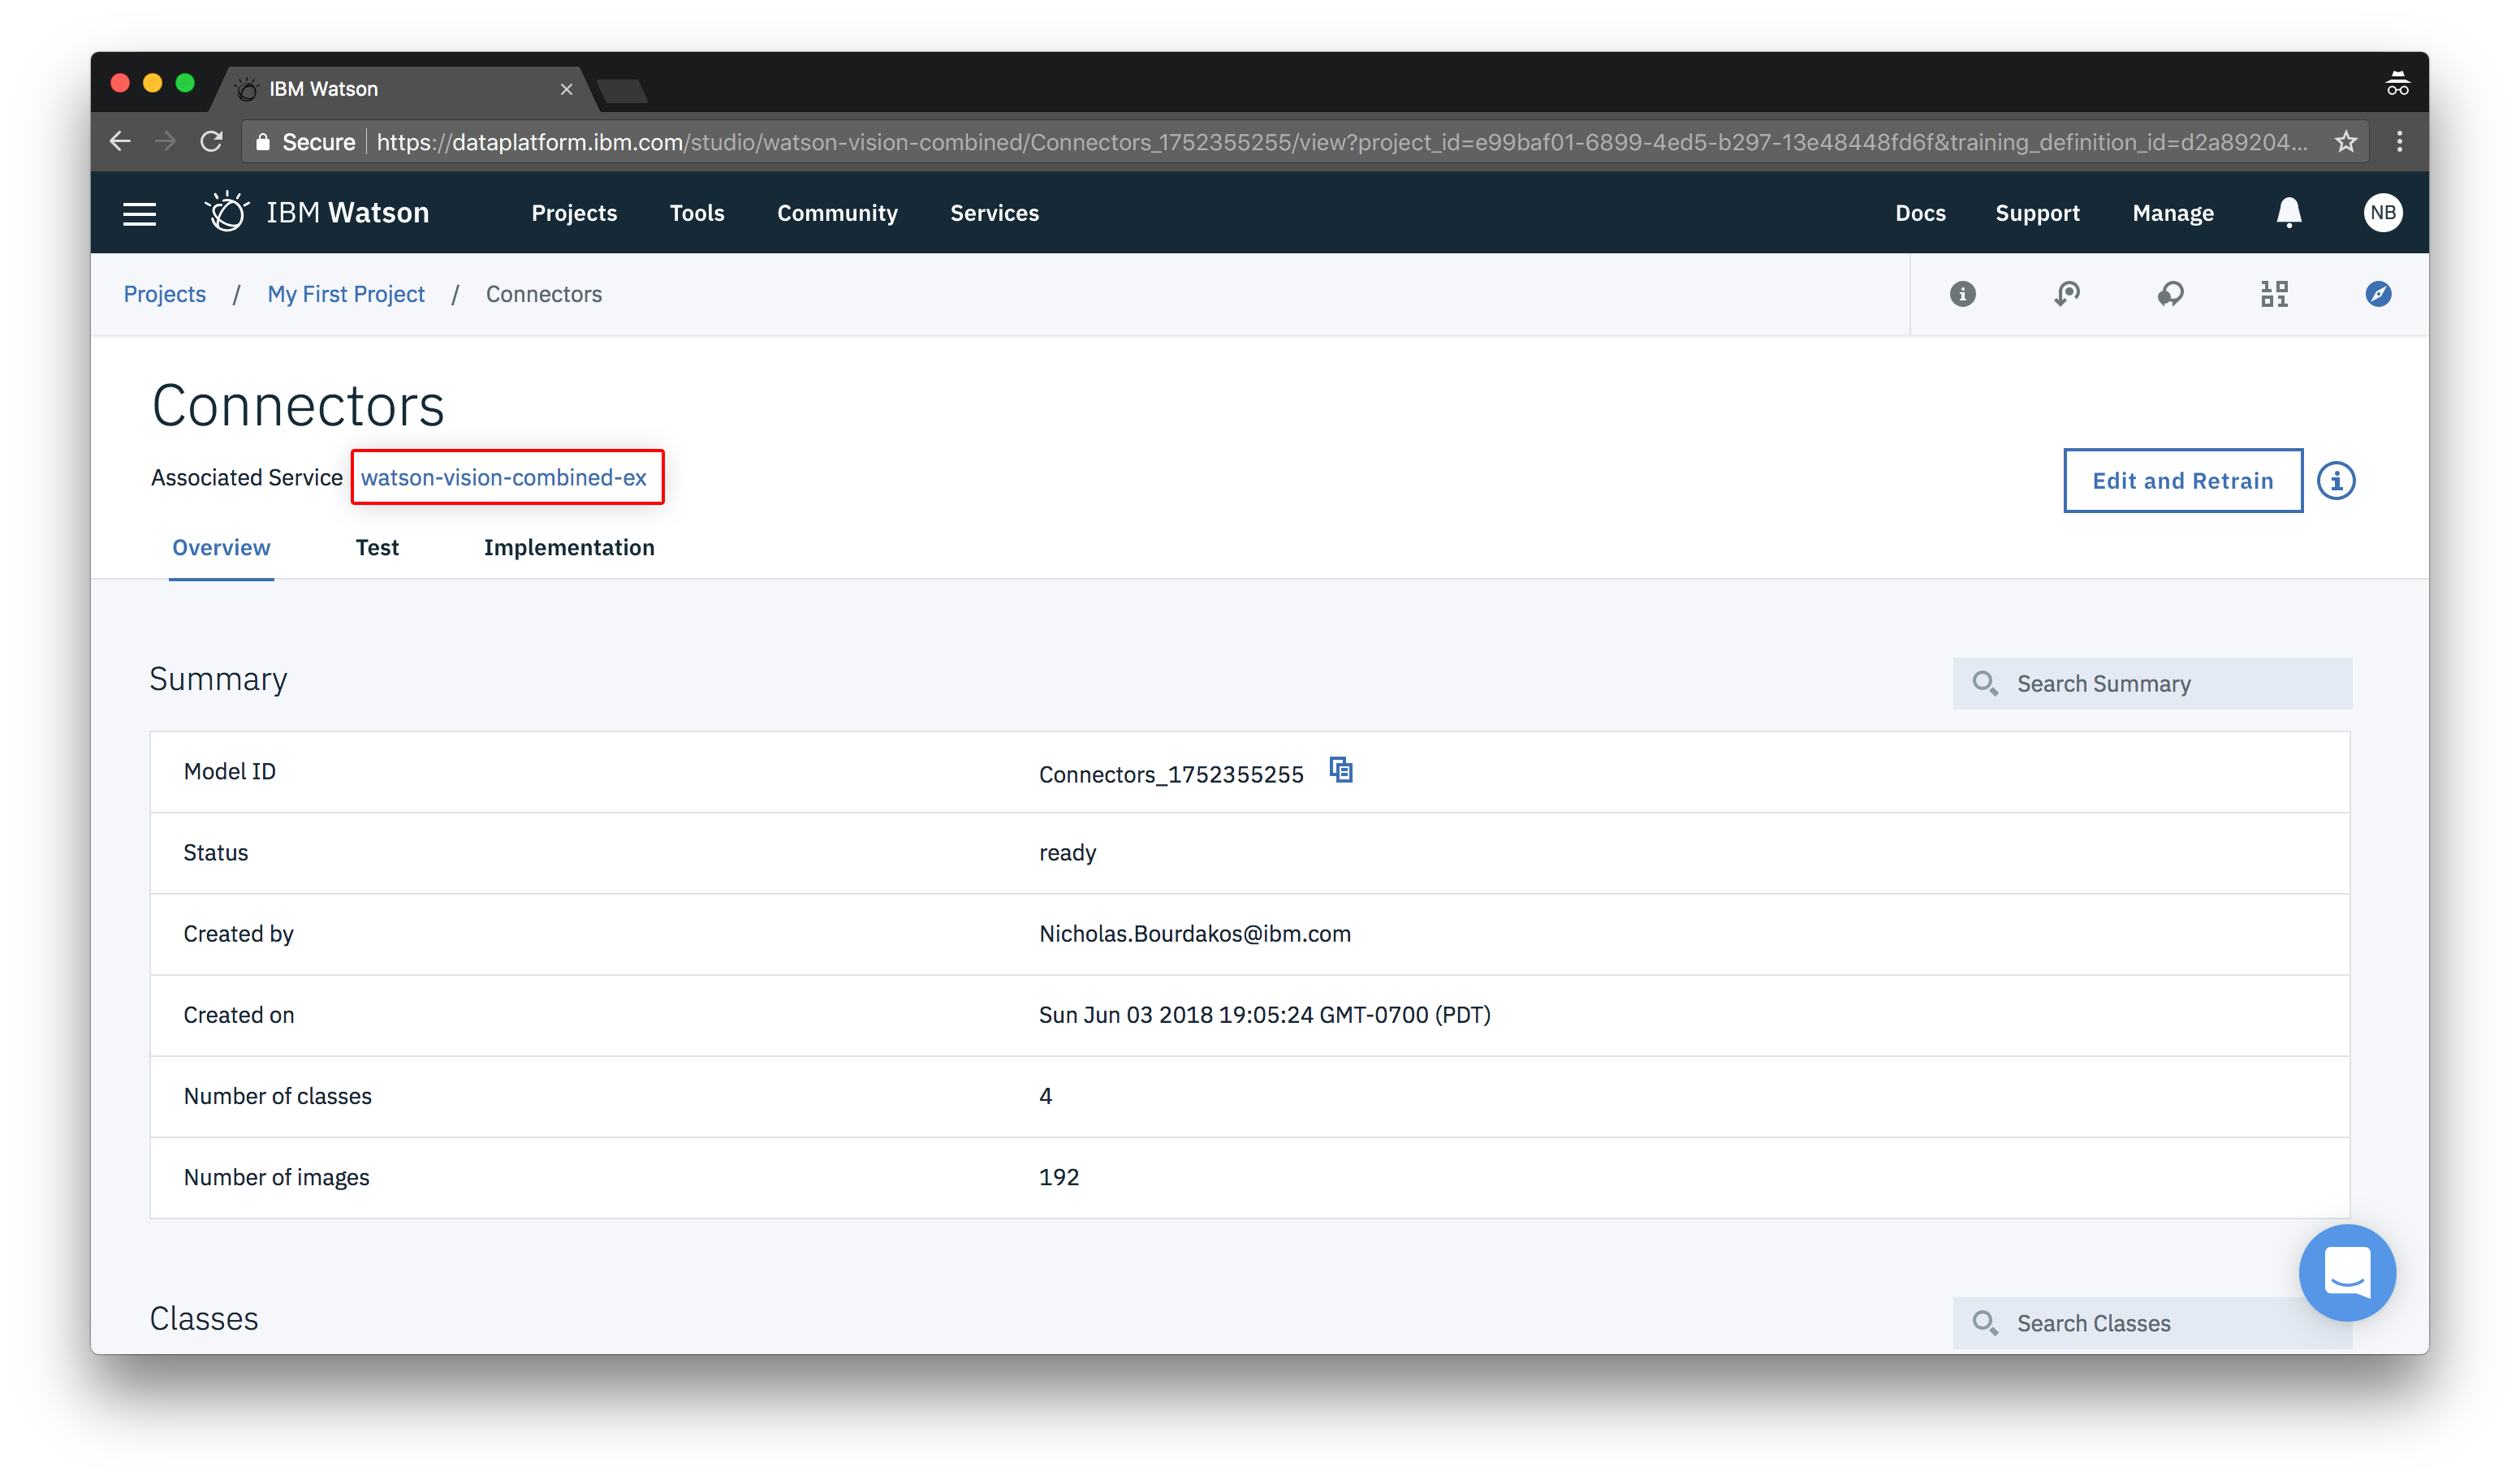
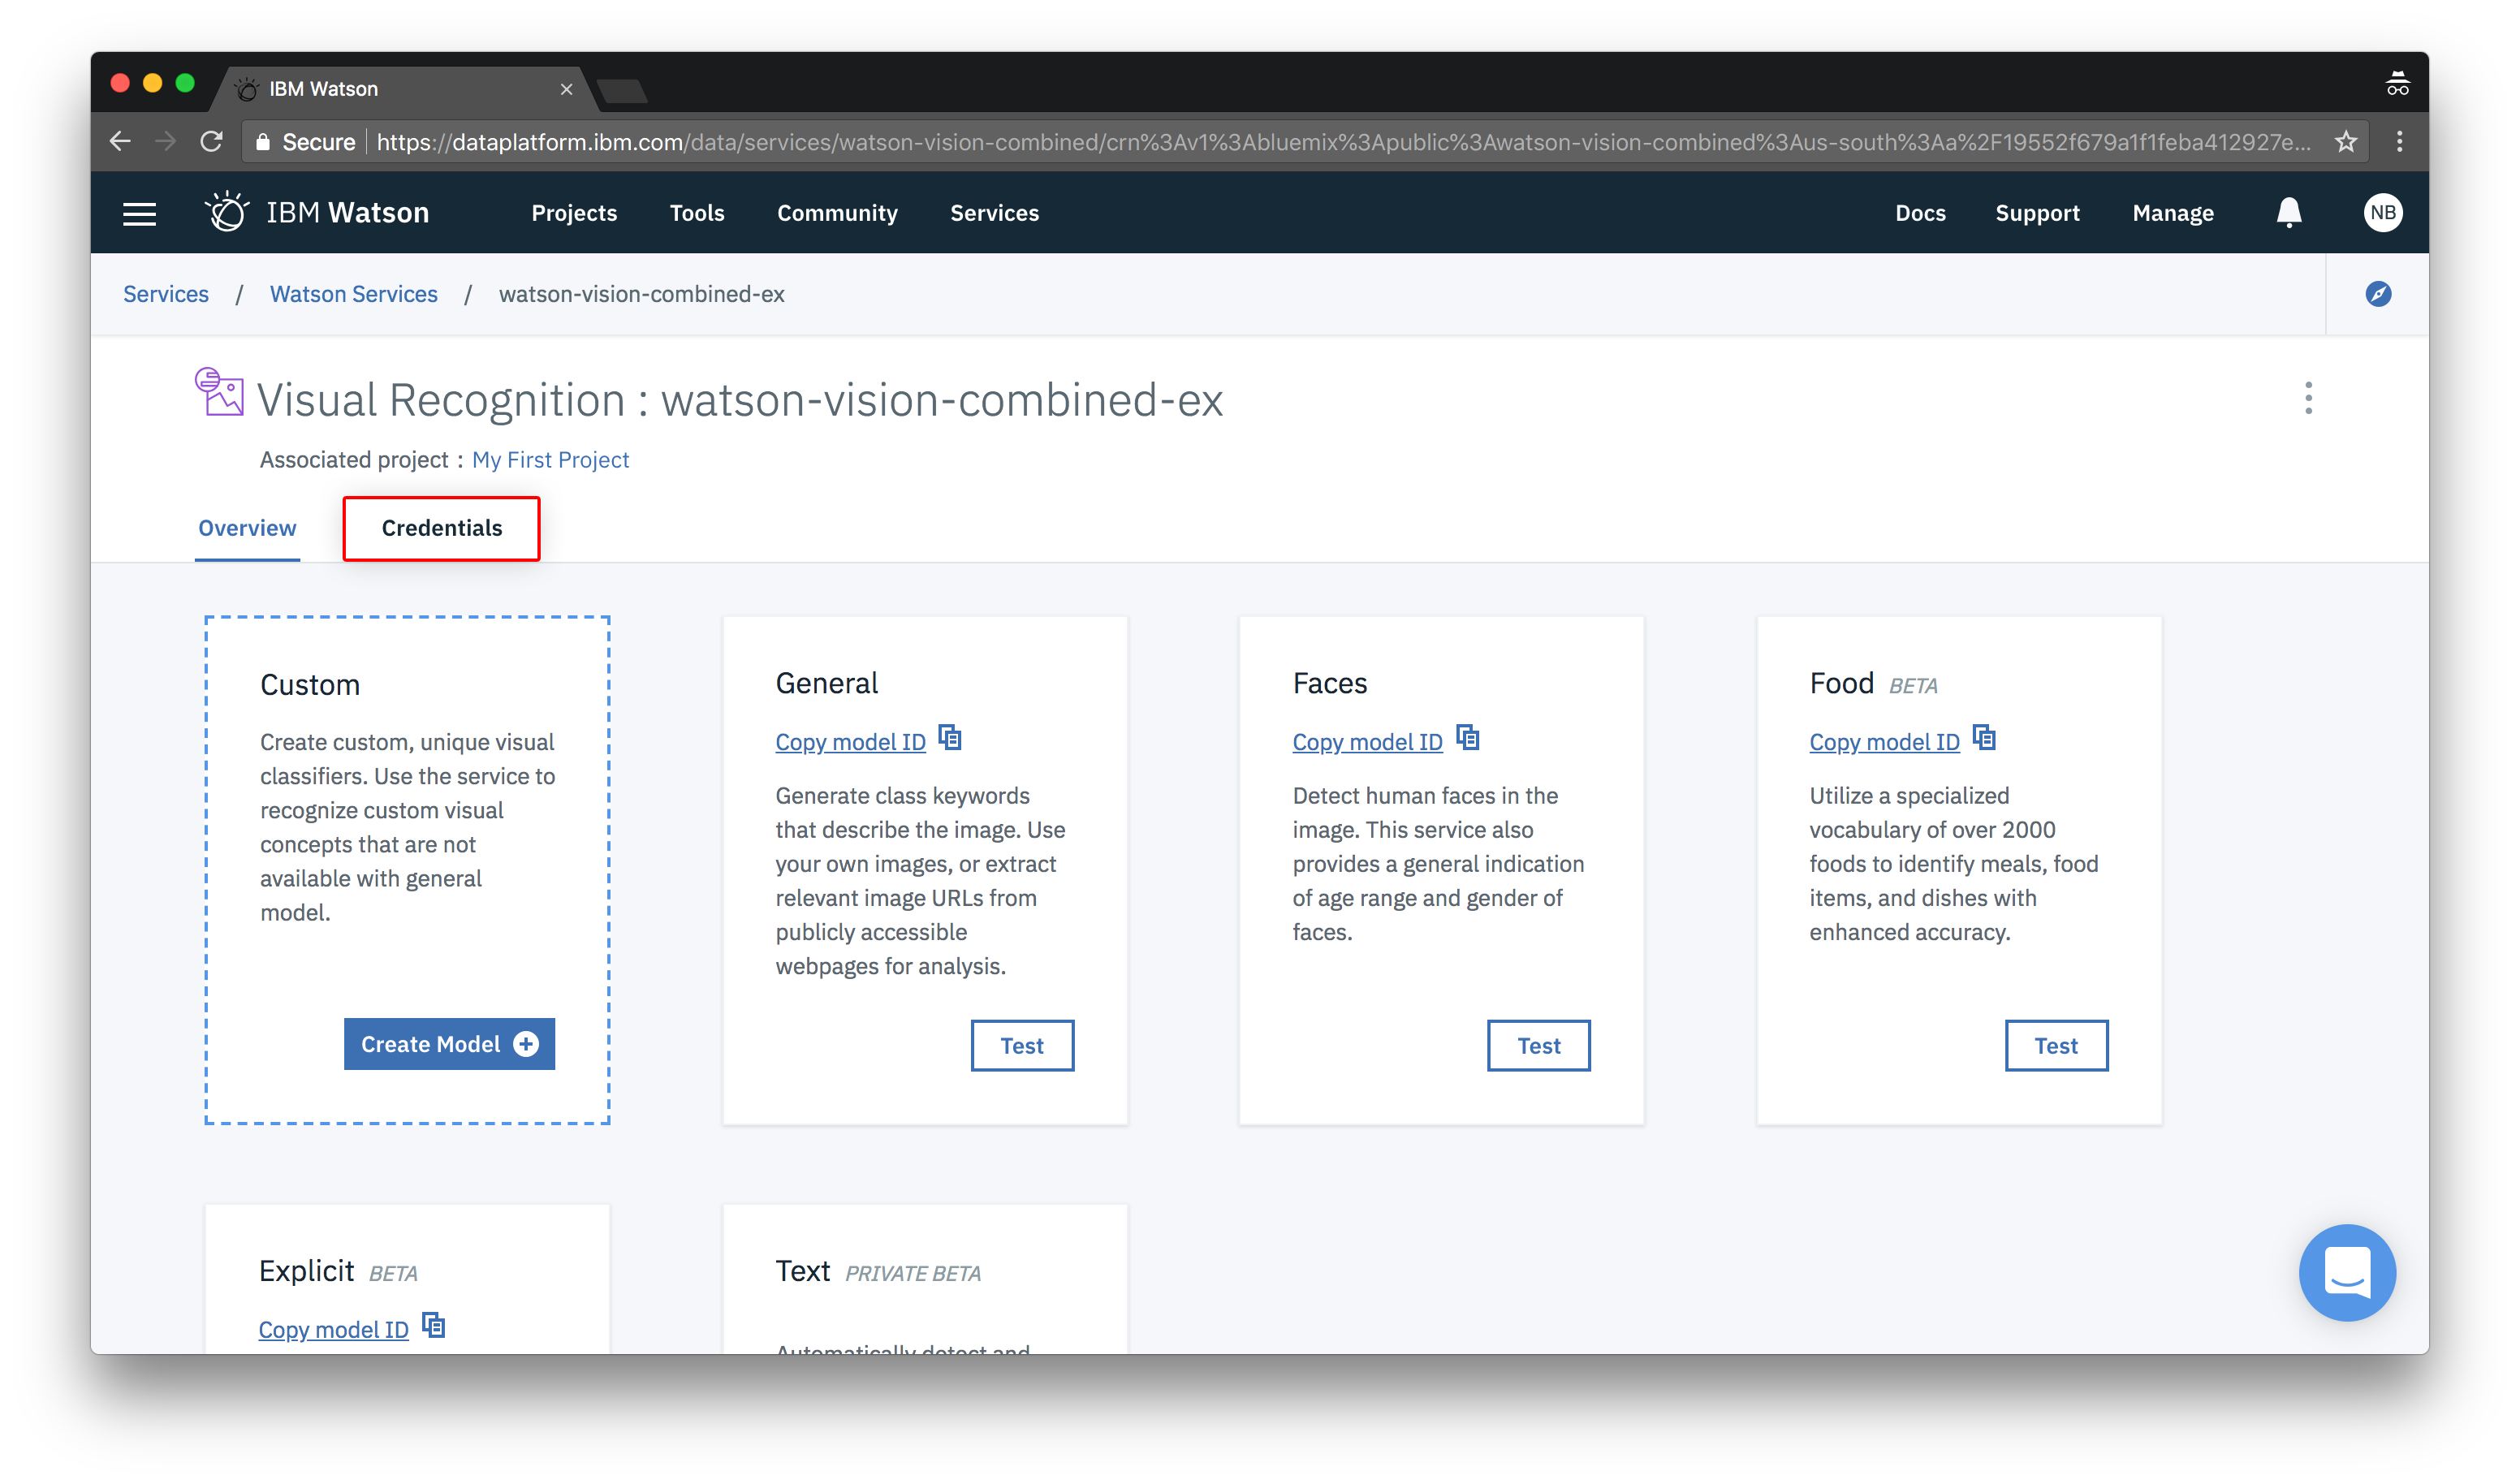
- Open the associated visual recognition service.
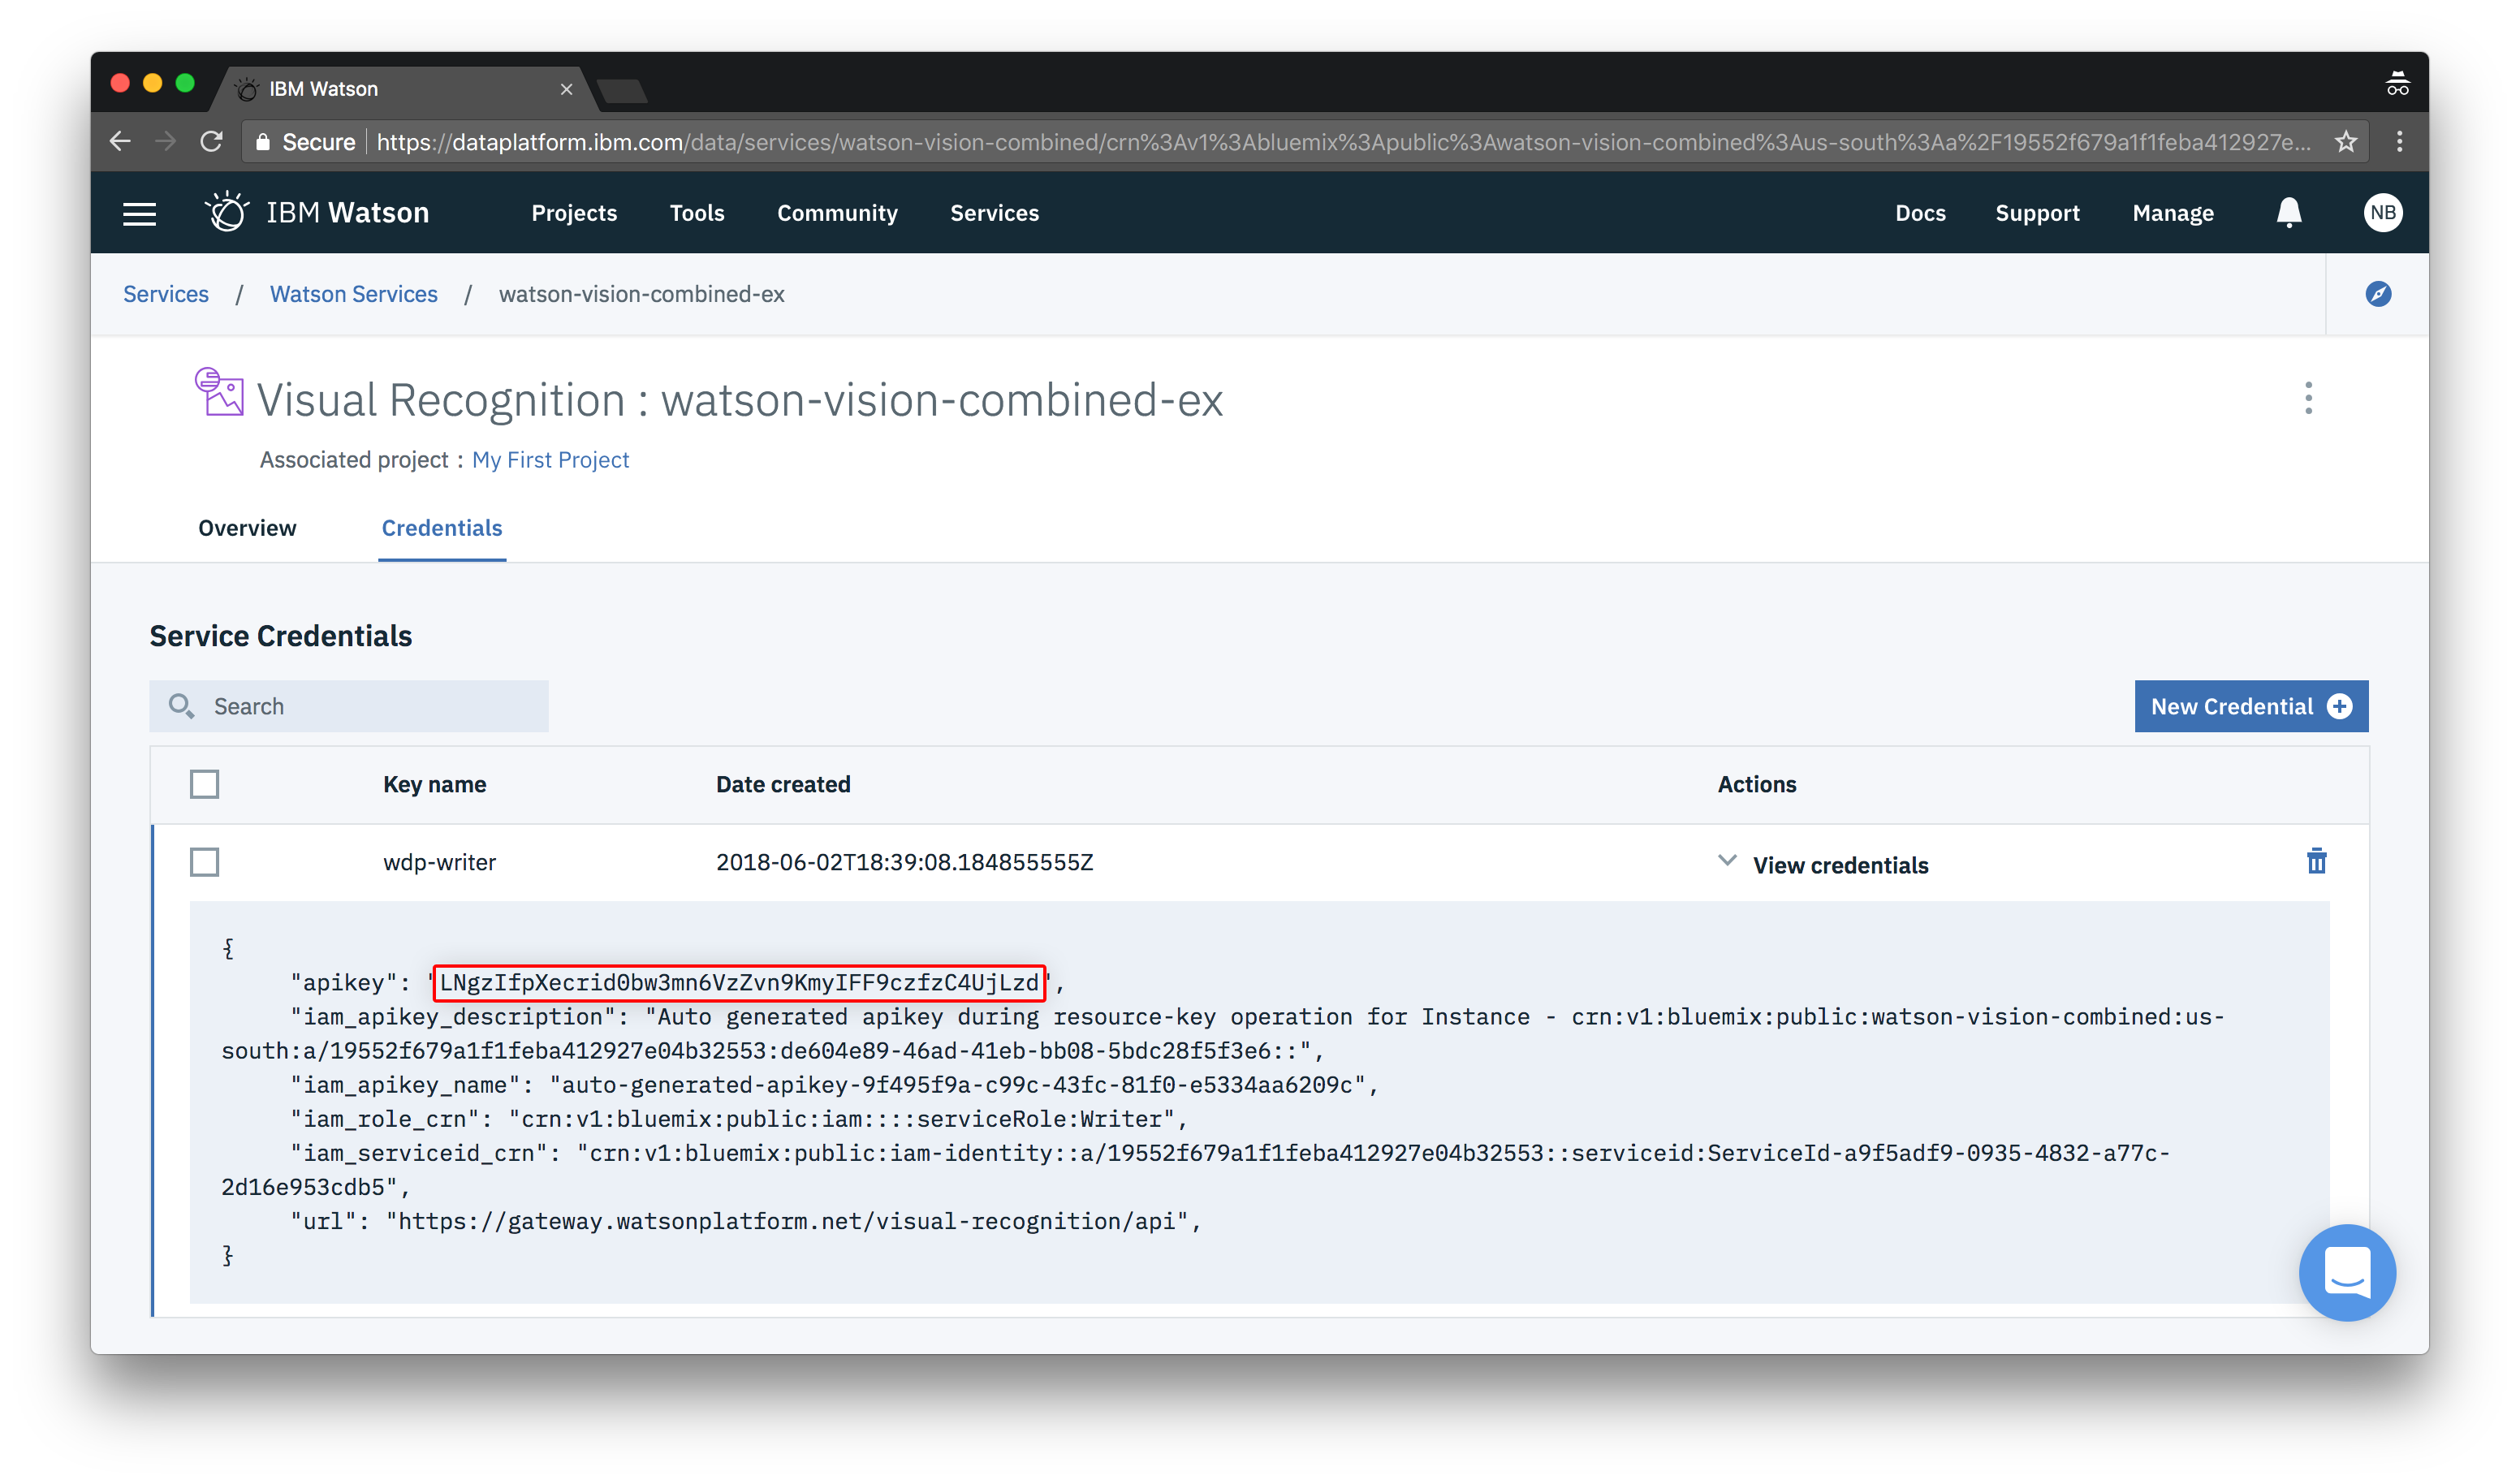
- Navigate to the Credentials tab.
- Copy your “apikey” and keep it handy for later.
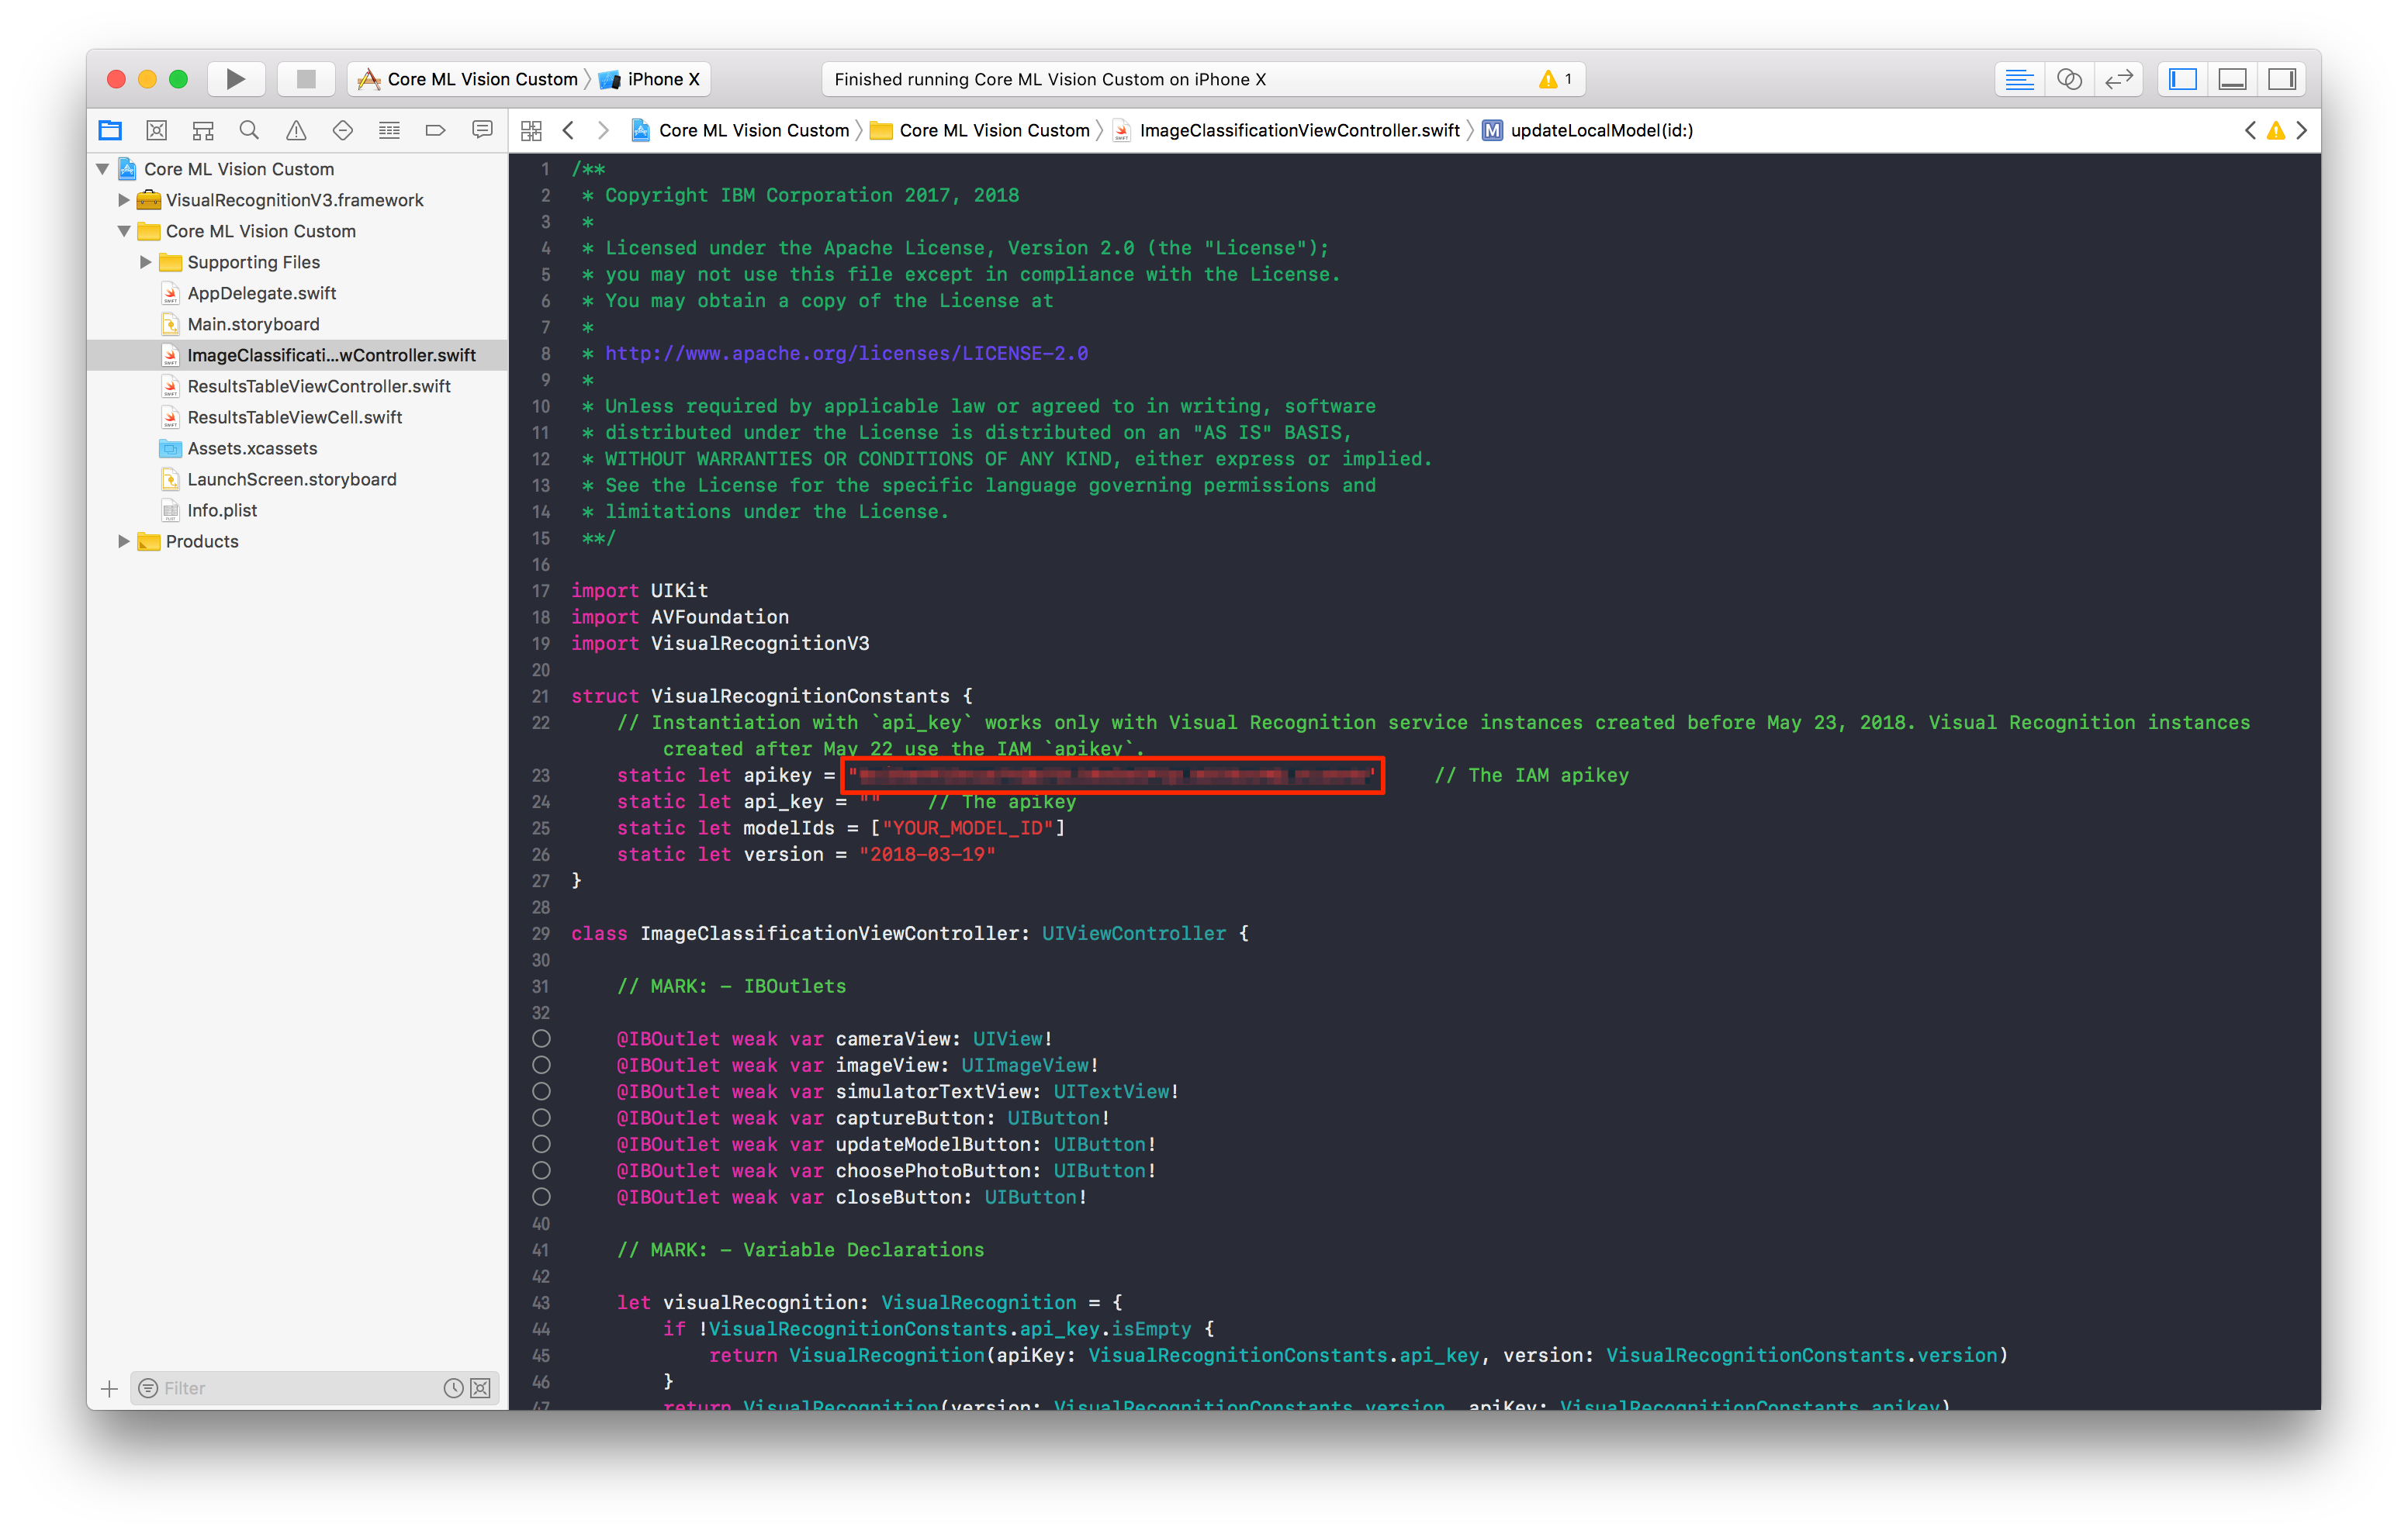
- Open the file called
ImageClassificationViewController.swiftand add your ModelID.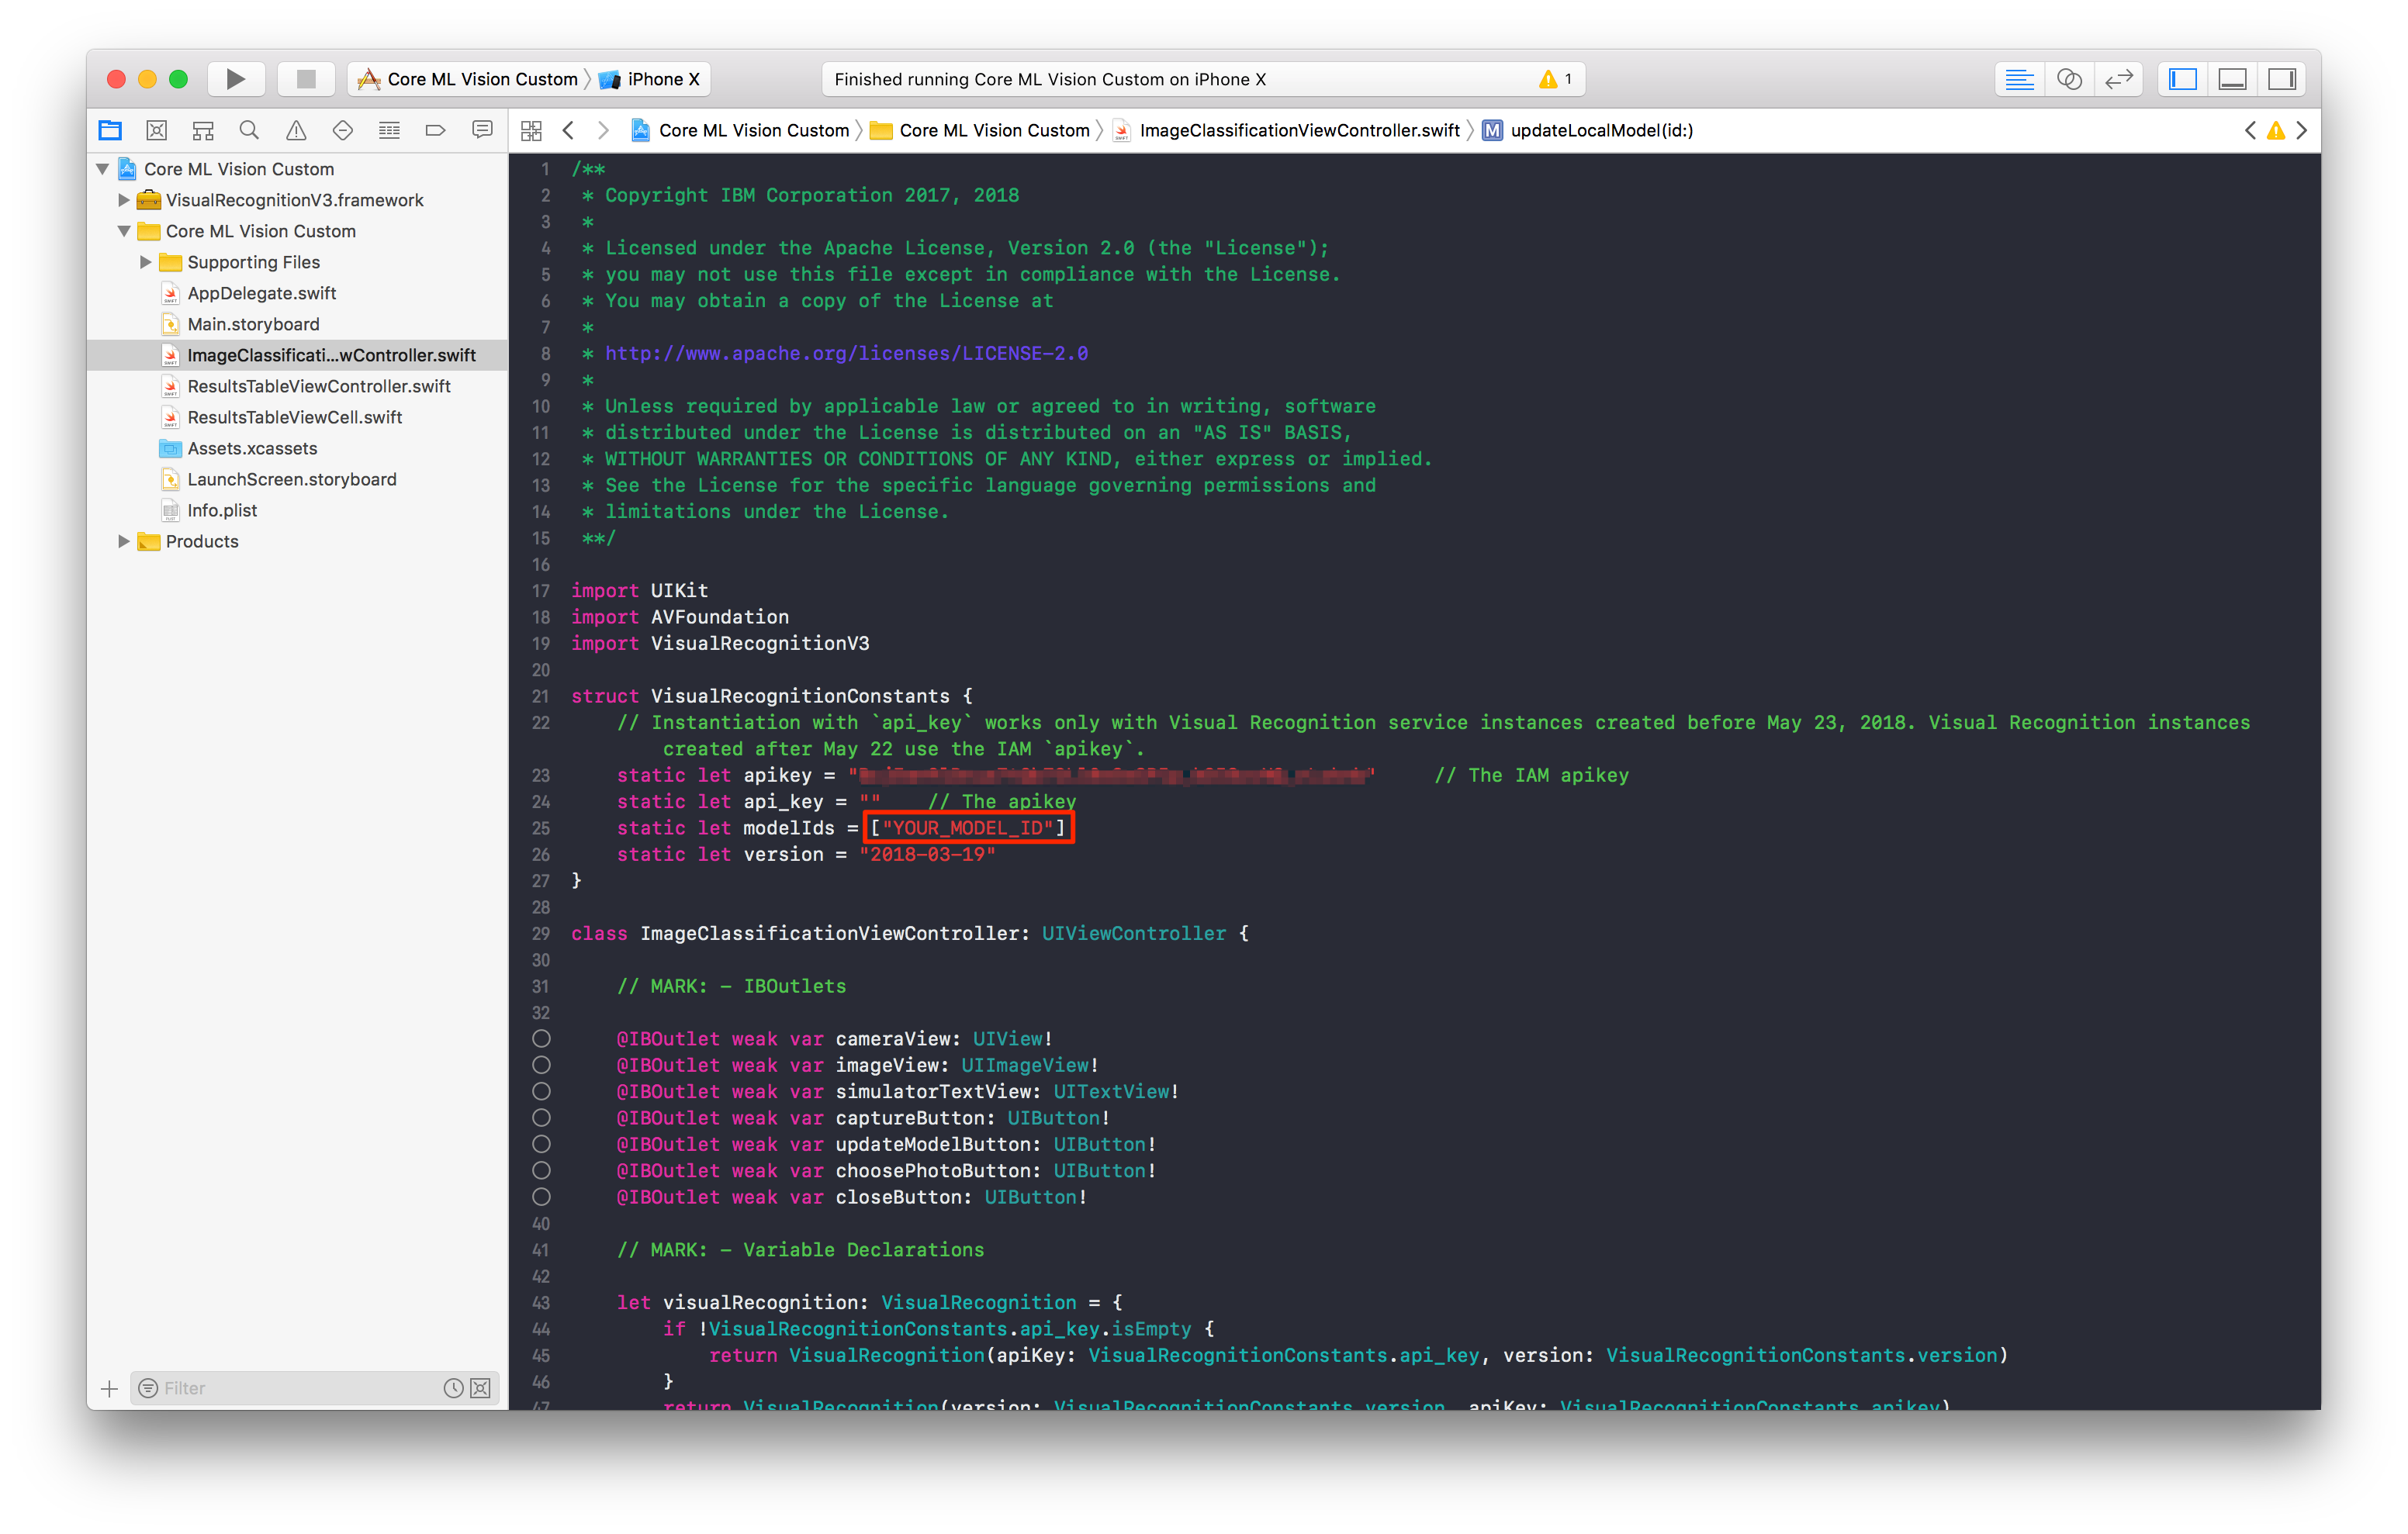
- Next, in the same file, add your api key.