swift-sdk
Quick Start Guide
This guide contains step-by-step instructions to create an iOS application with the Watson Developer Cloud Swift SDK. The application we build will synthesize English text into spoken audio using the Watson Text to Speech service.
Create Application
-
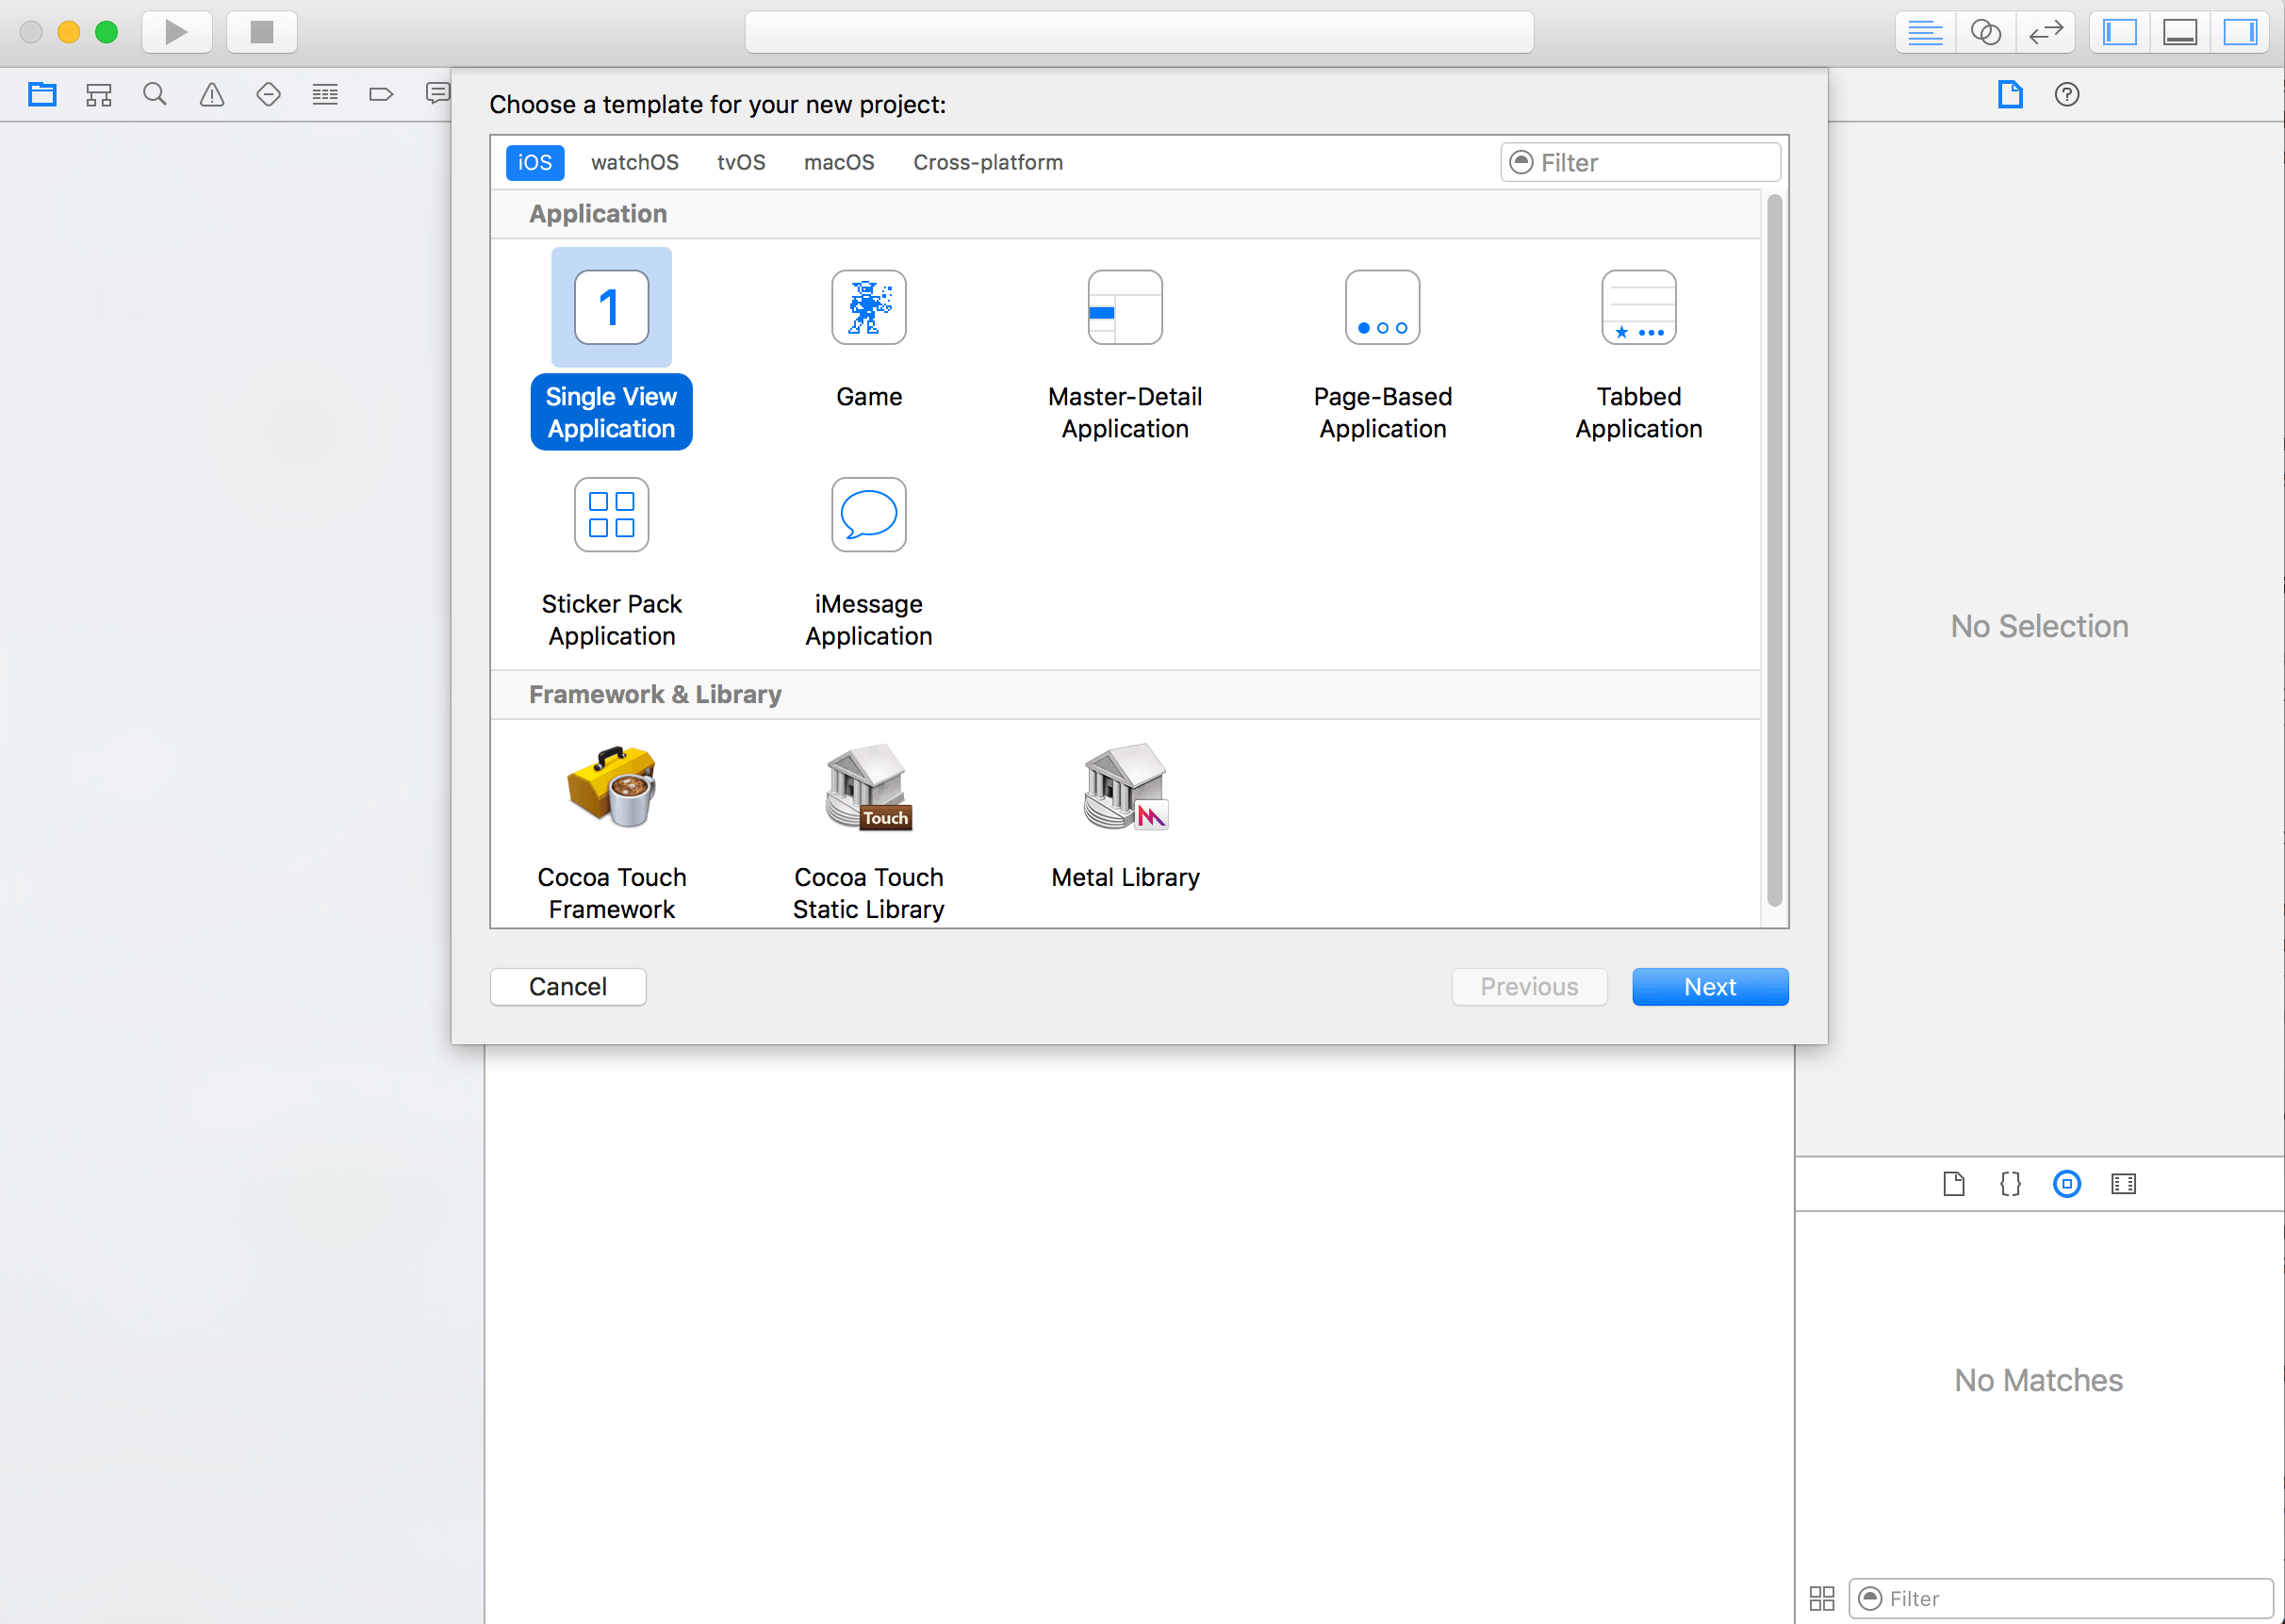
Open Xcode and create a new project with the “Single View Application” template.
-
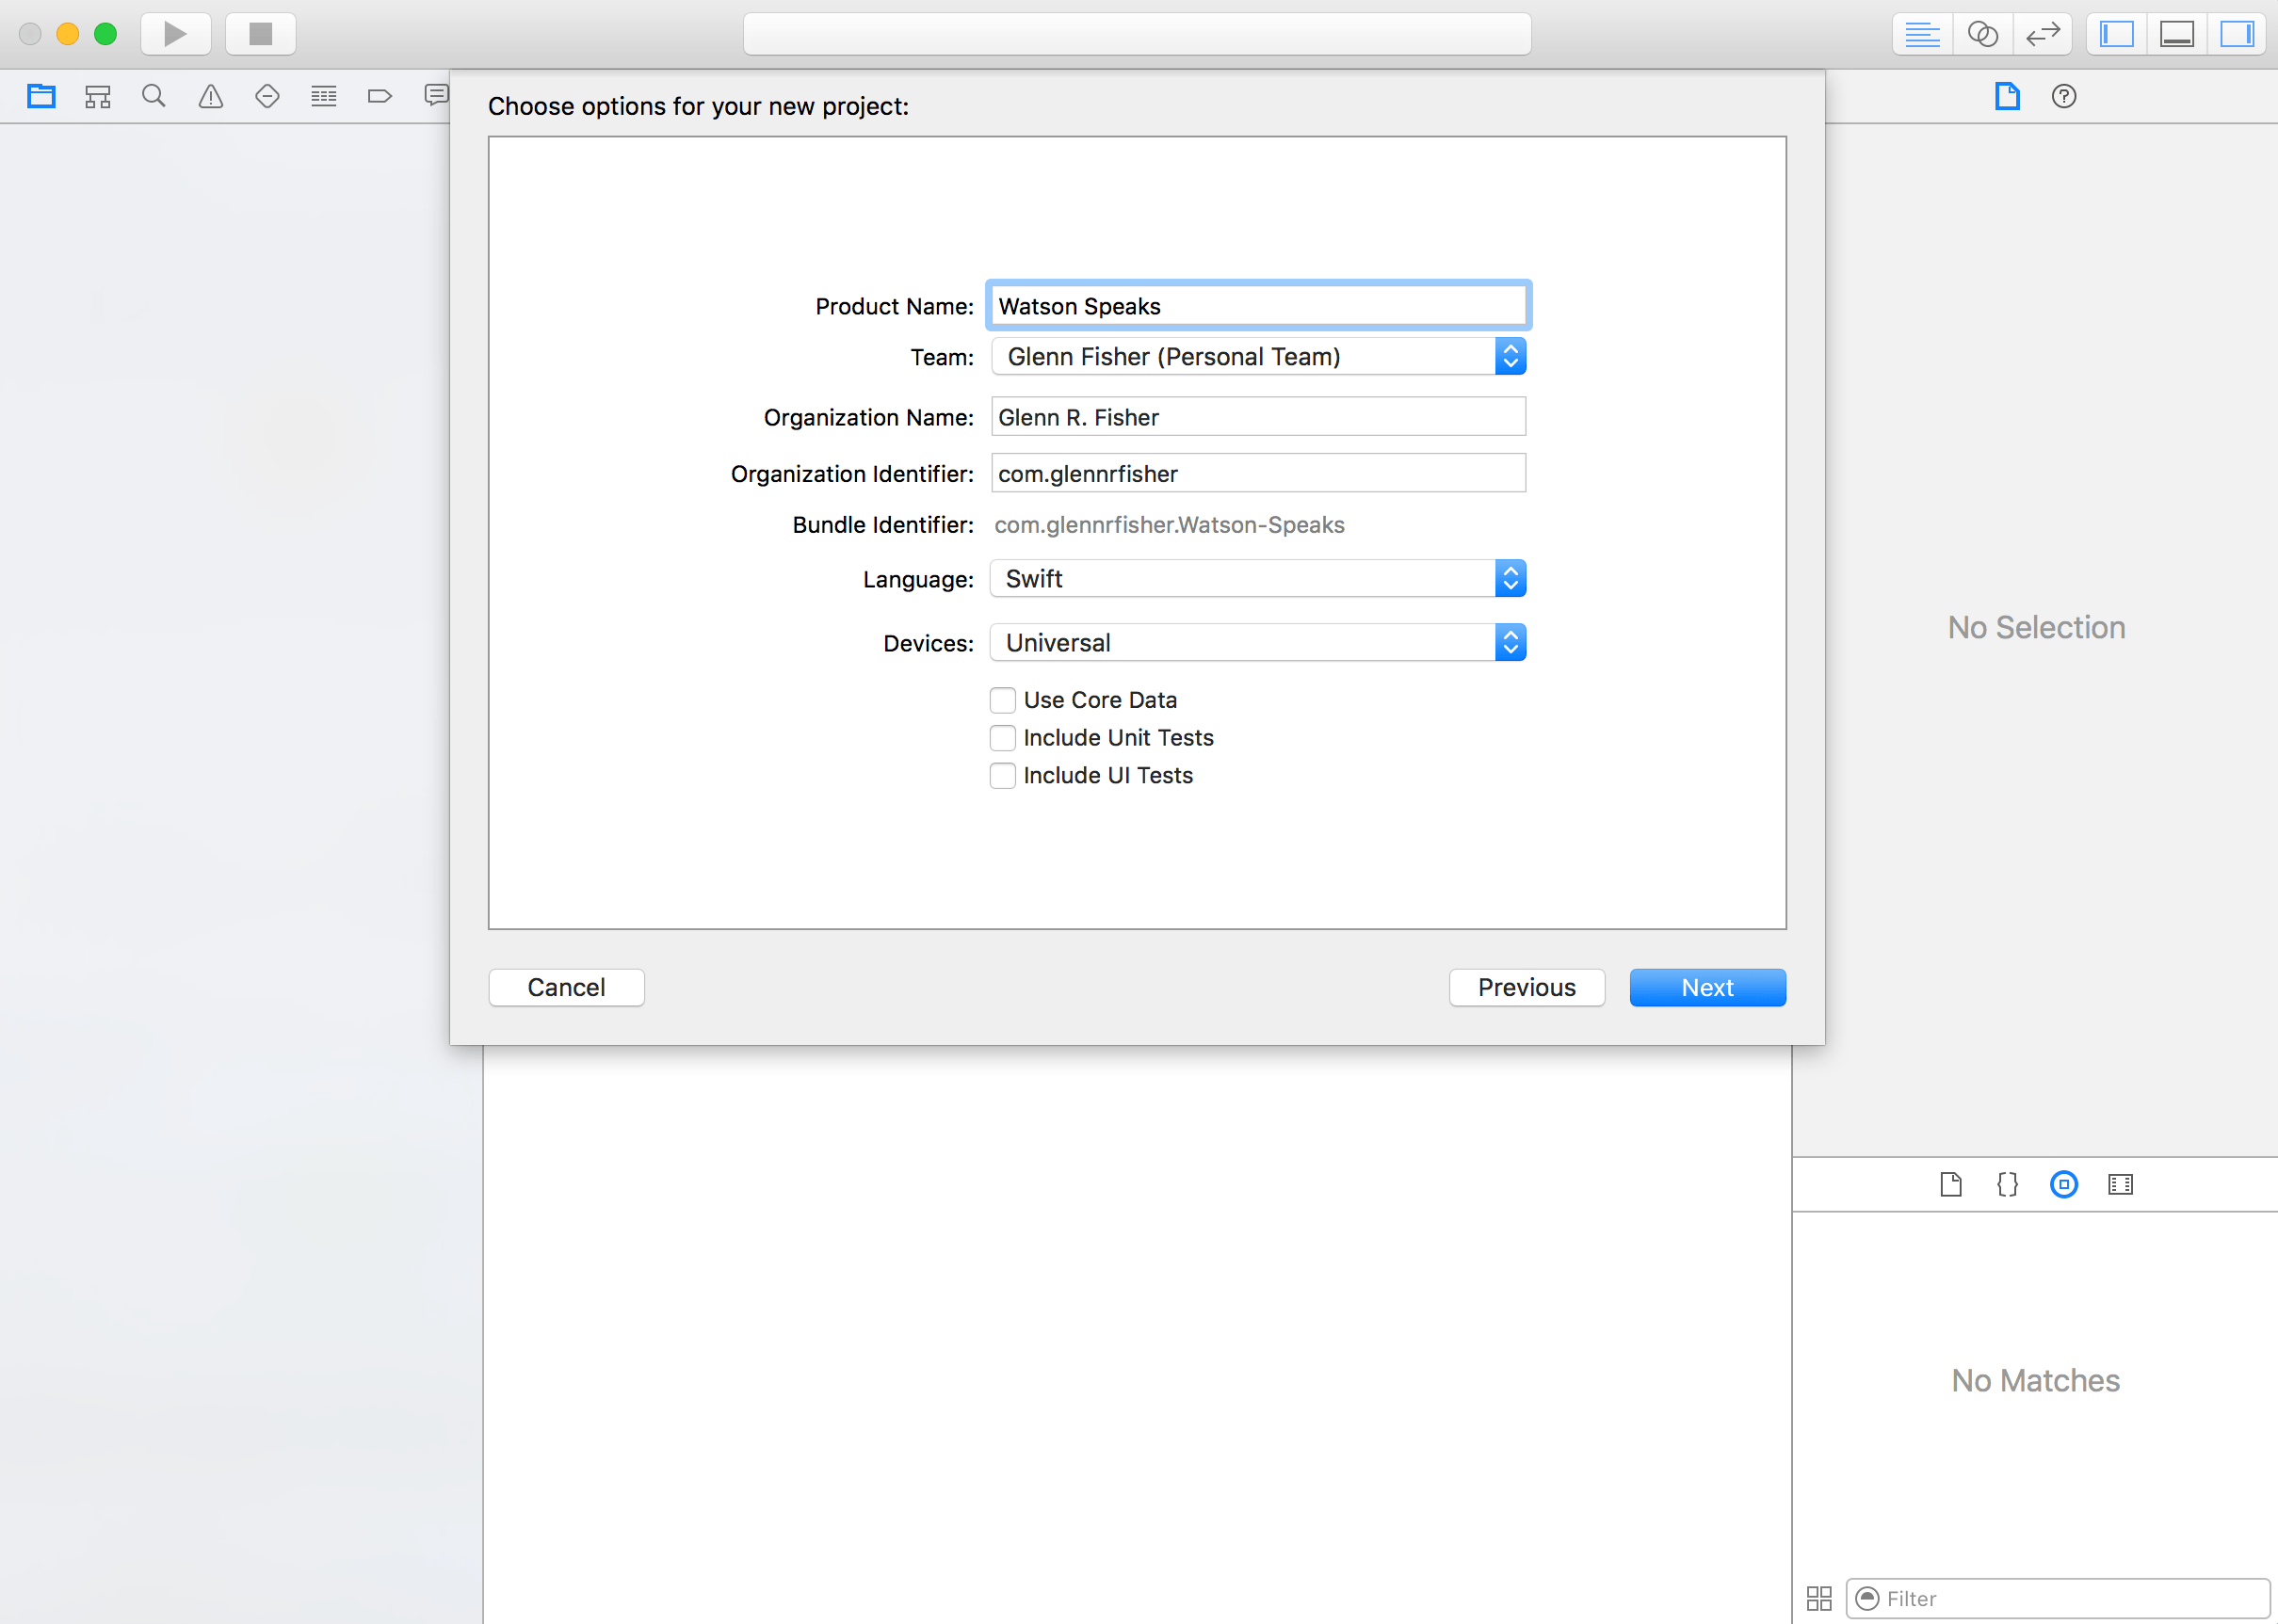
Set the product name to “Watson Speaks” and language to “Swift.”
Download and Build the Swift SDK Frameworks
We will use the Carthage dependency manager to download and build the Swift SDK. You will need to install Carthage if it is not already installed on your system.
-
Create a file in your project directory called
Cartfile.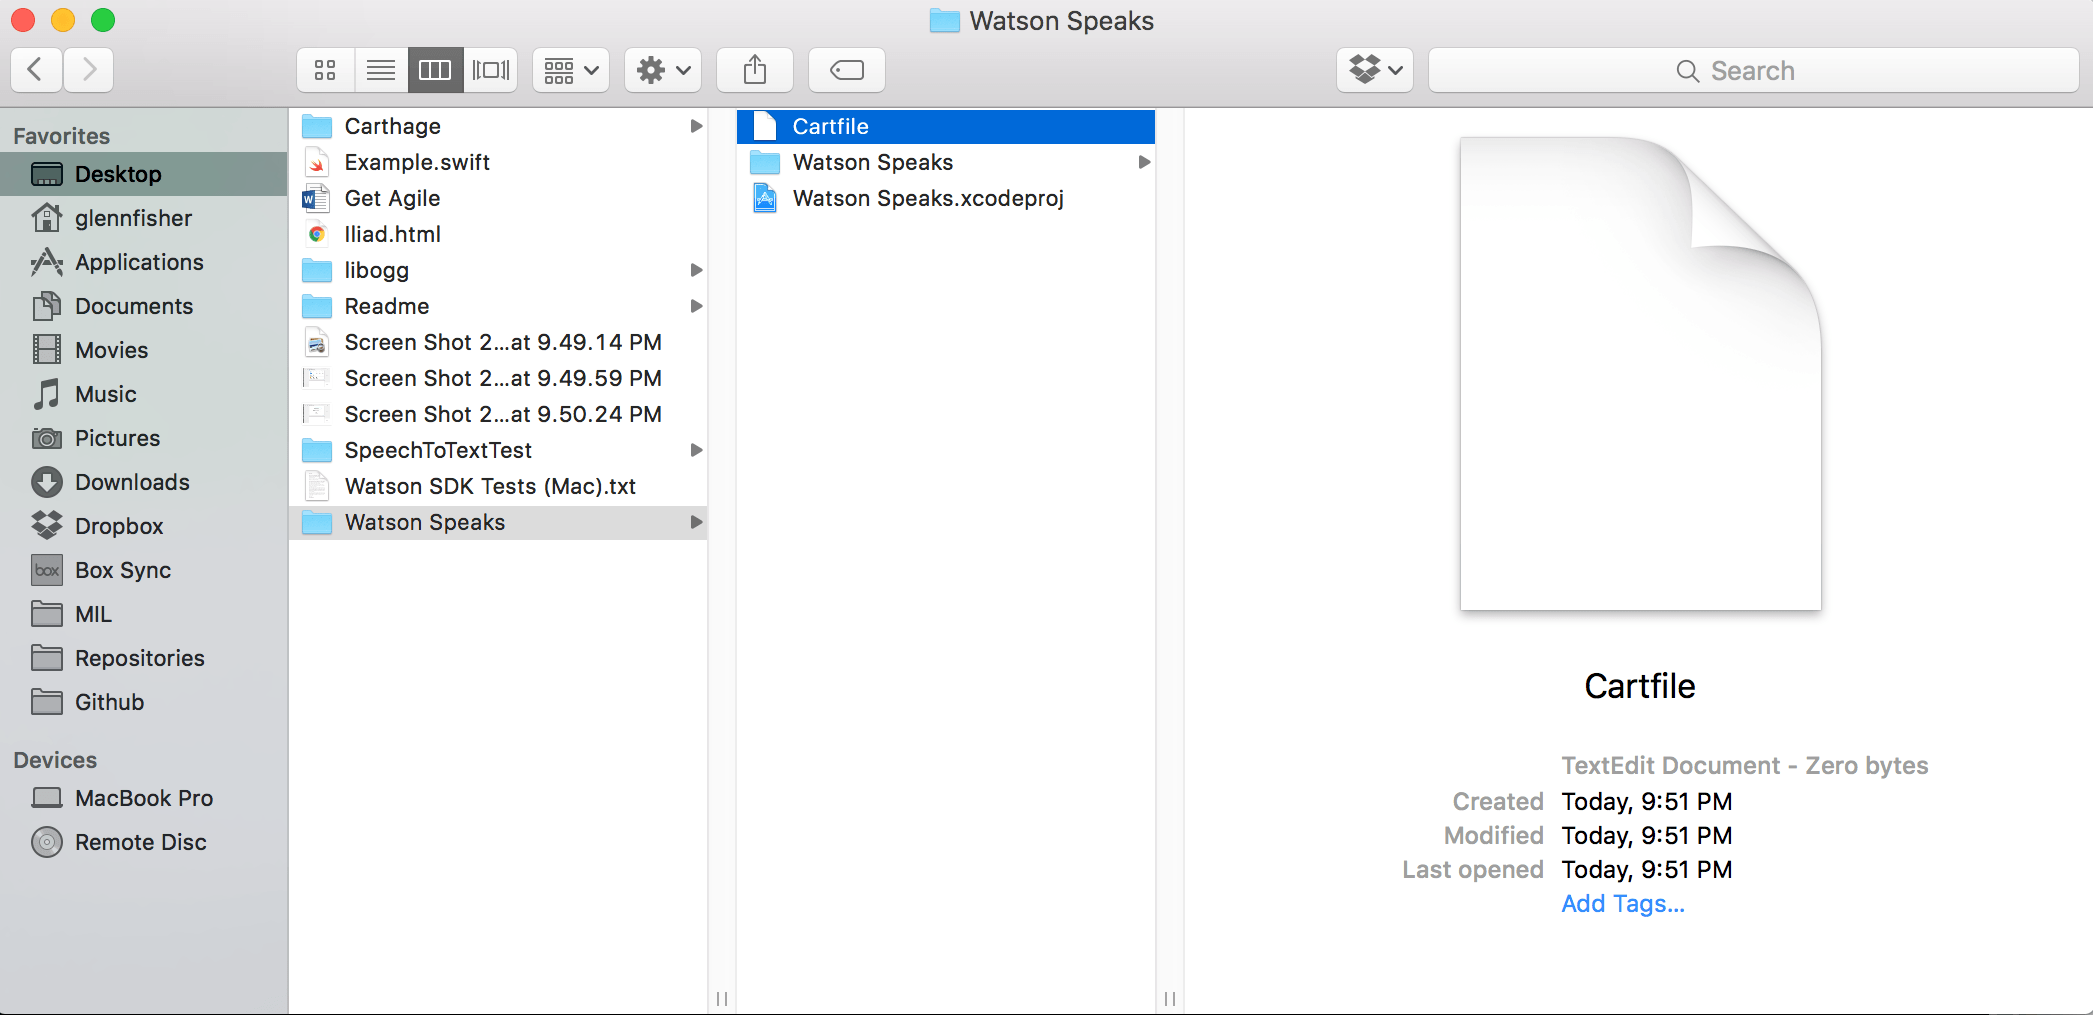
-
Add the following line to your
Cartfile. This specifies the Swift SDK as a dependency. In a production app, you may also want to specify a version requirement.github "watson-developer-cloud/swift-sdk"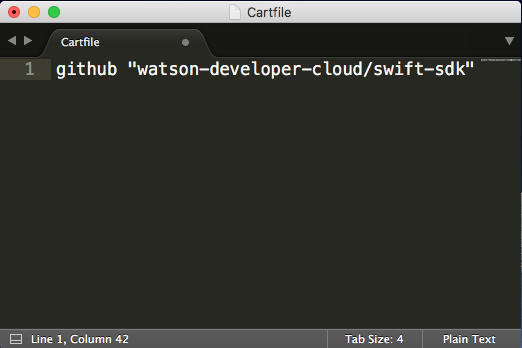
-
Open the Terminal and navigate to your project directory. Then use Carthage to download and build the Swift SDK:
$ carthage update --platform iOS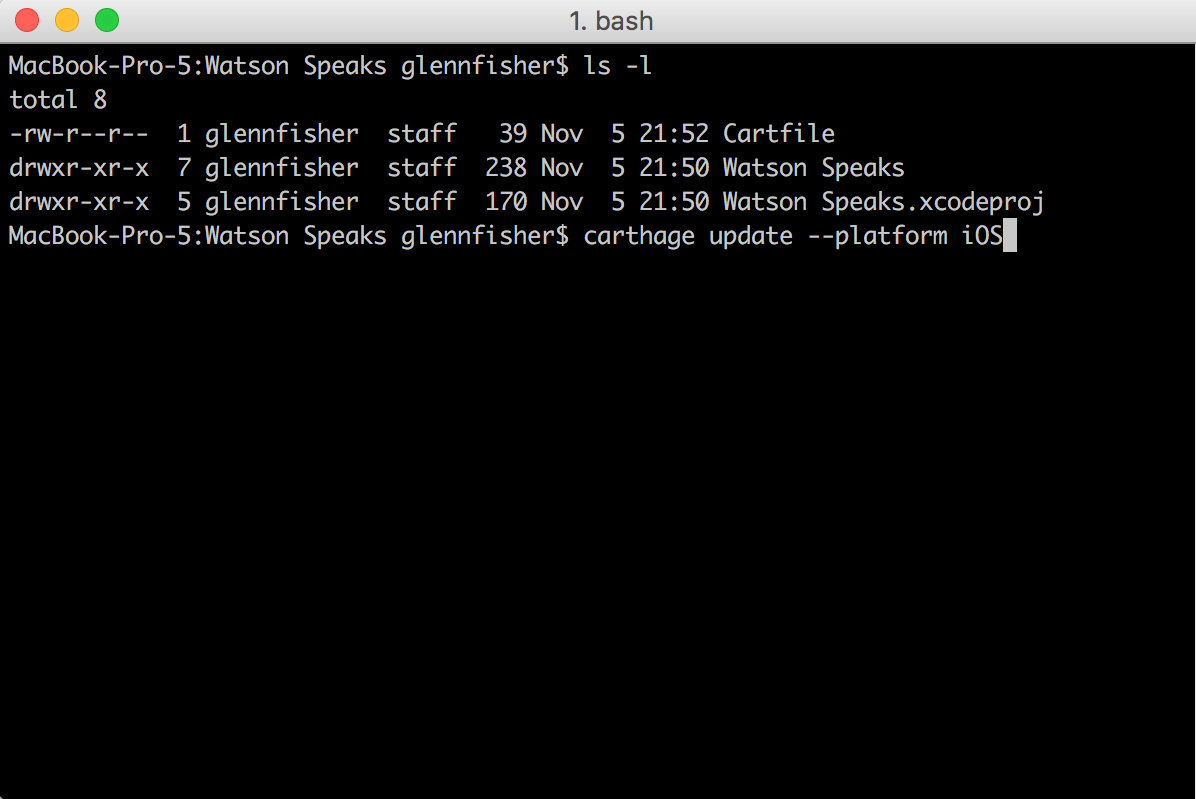
Carthage clones the Swift SDK repository and builds a framework for each Watson service in the Carthage/Build/iOS directory. It also builds a framework called RestKit that is used internally for networking and JSON parsing.
Add Swift SDK Frameworks to Application
To use the Swift SDK frameworks, we need to link them with our application.
-
In Xcode, navigate to your application target’s “General” settings tab. Then scroll down to the “Linked Frameworks and Libraries” section and click the
+icon.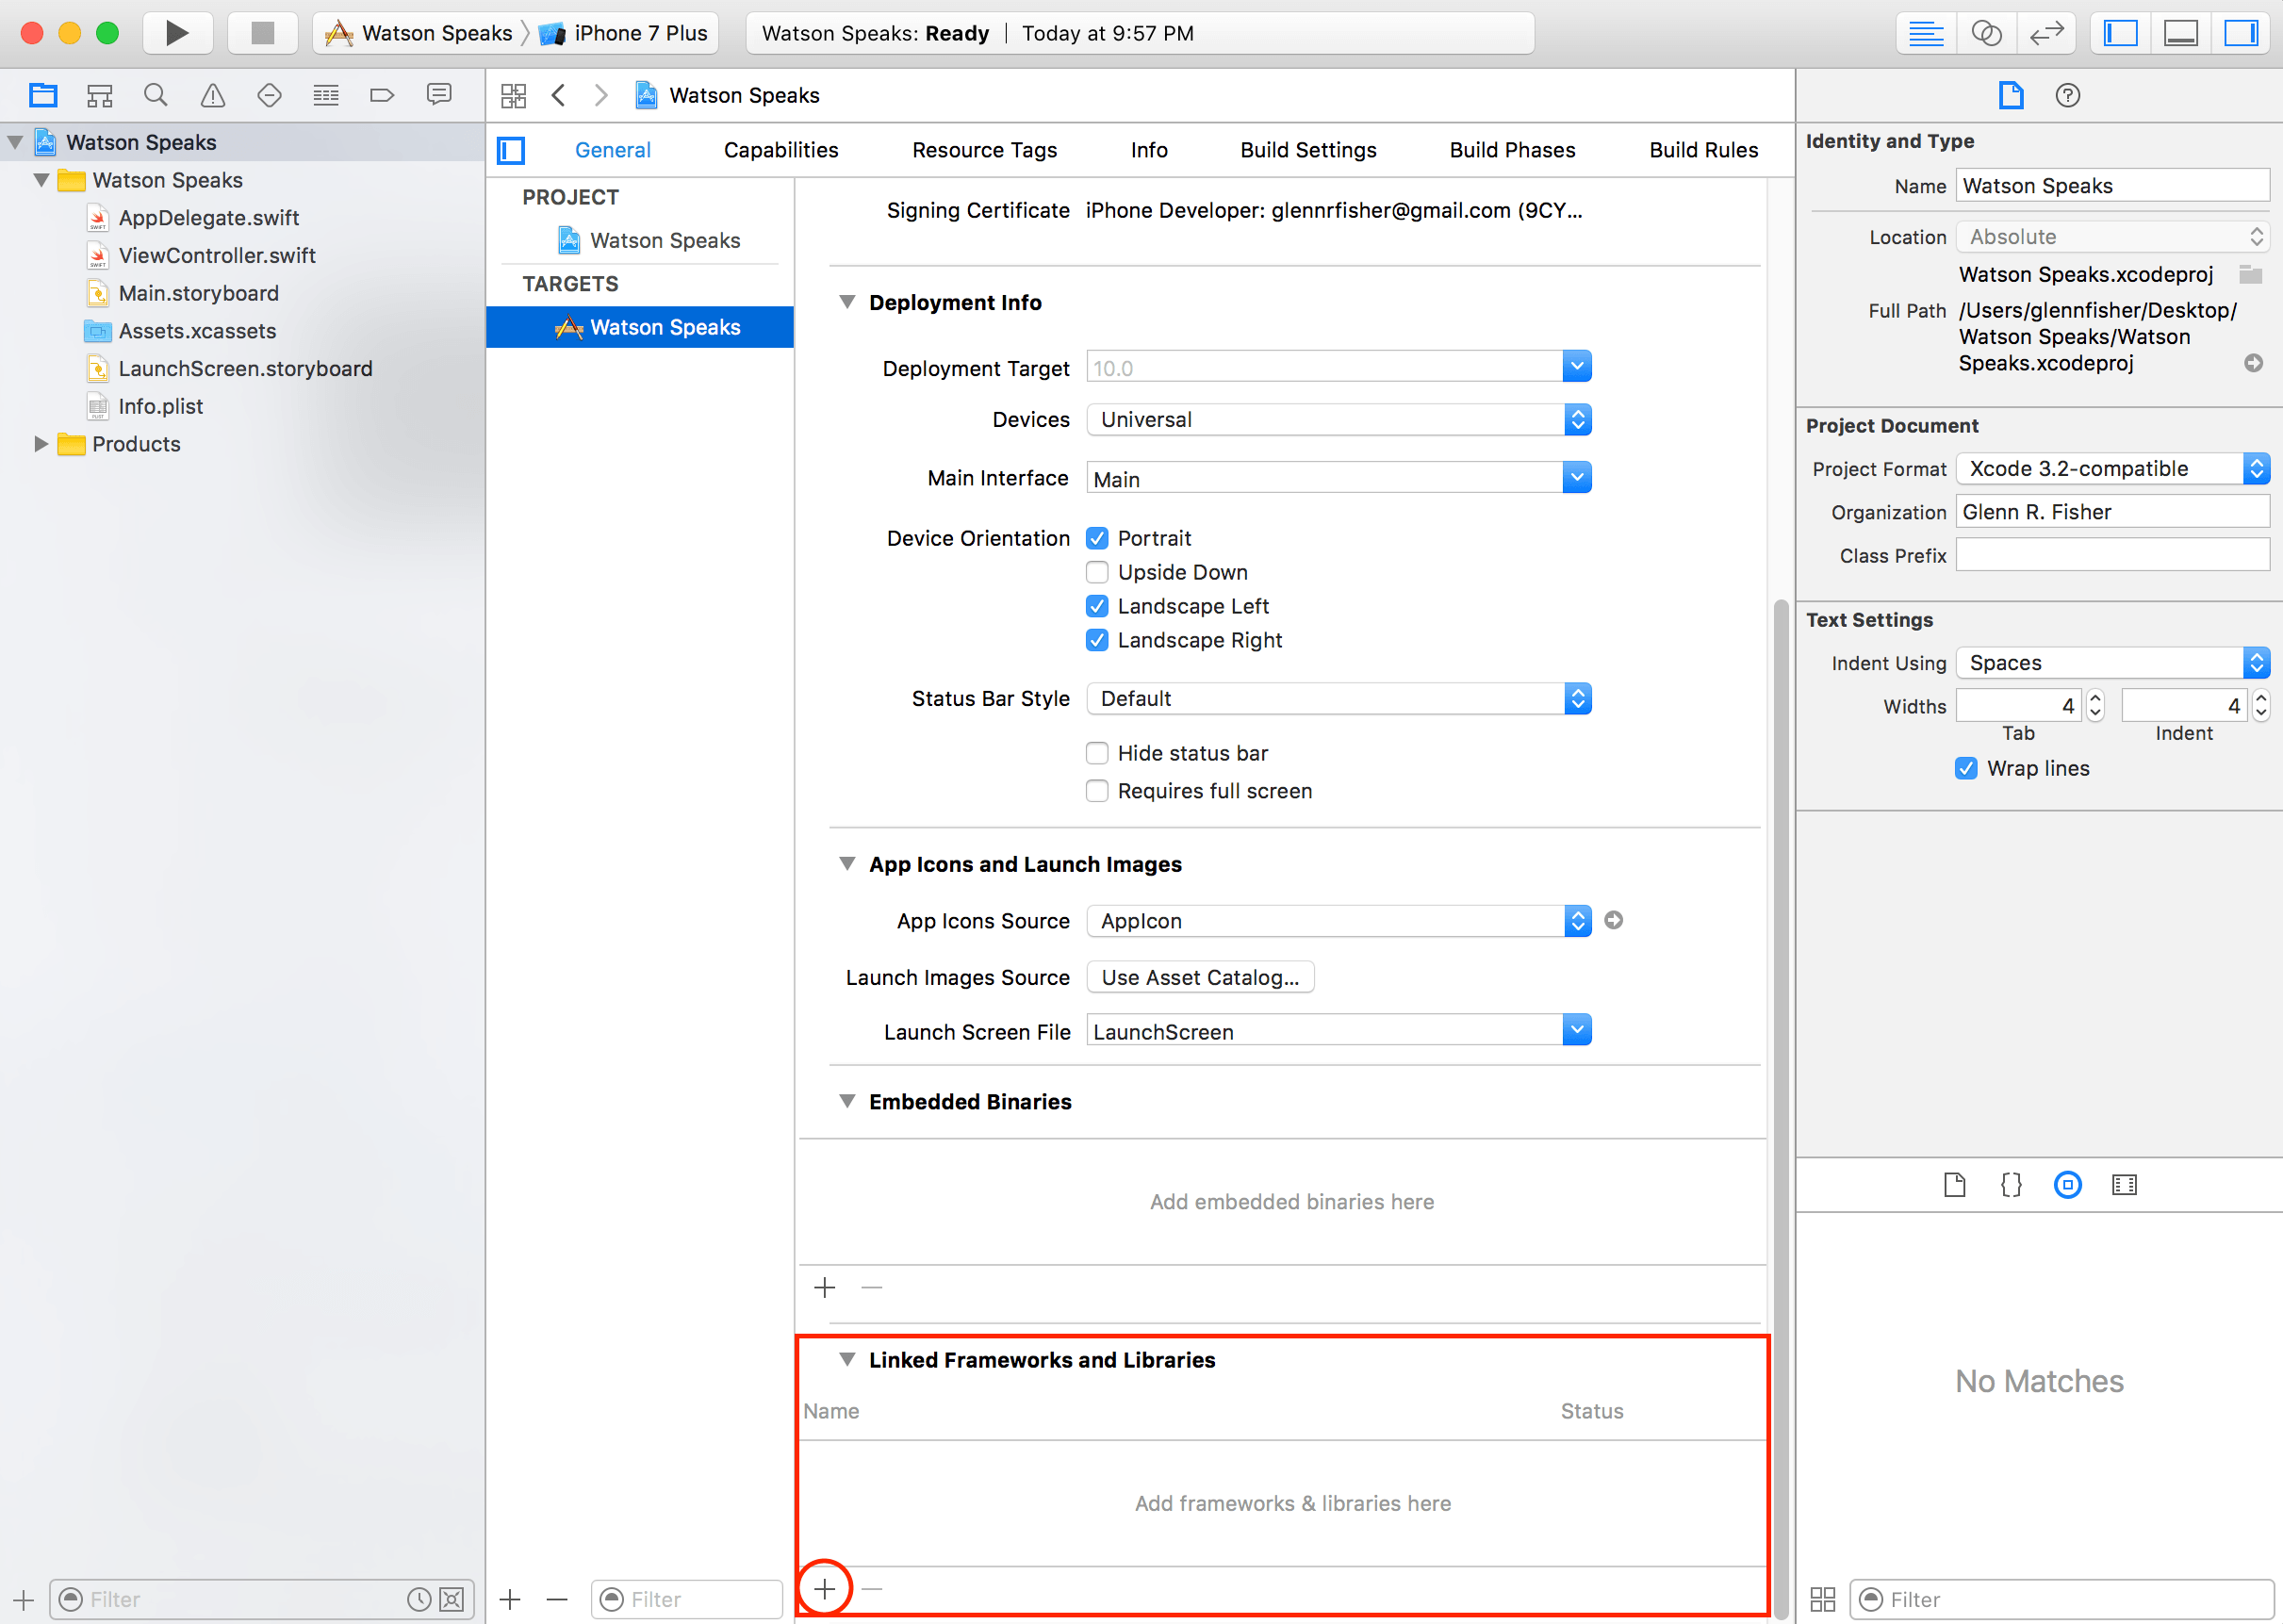
-
In the window that appears, choose “Add Other…” and navigate to the
Carthage/Build/iOSdirectory. Select theTextToSpeechV1andRestKitframeworks to link them with your application.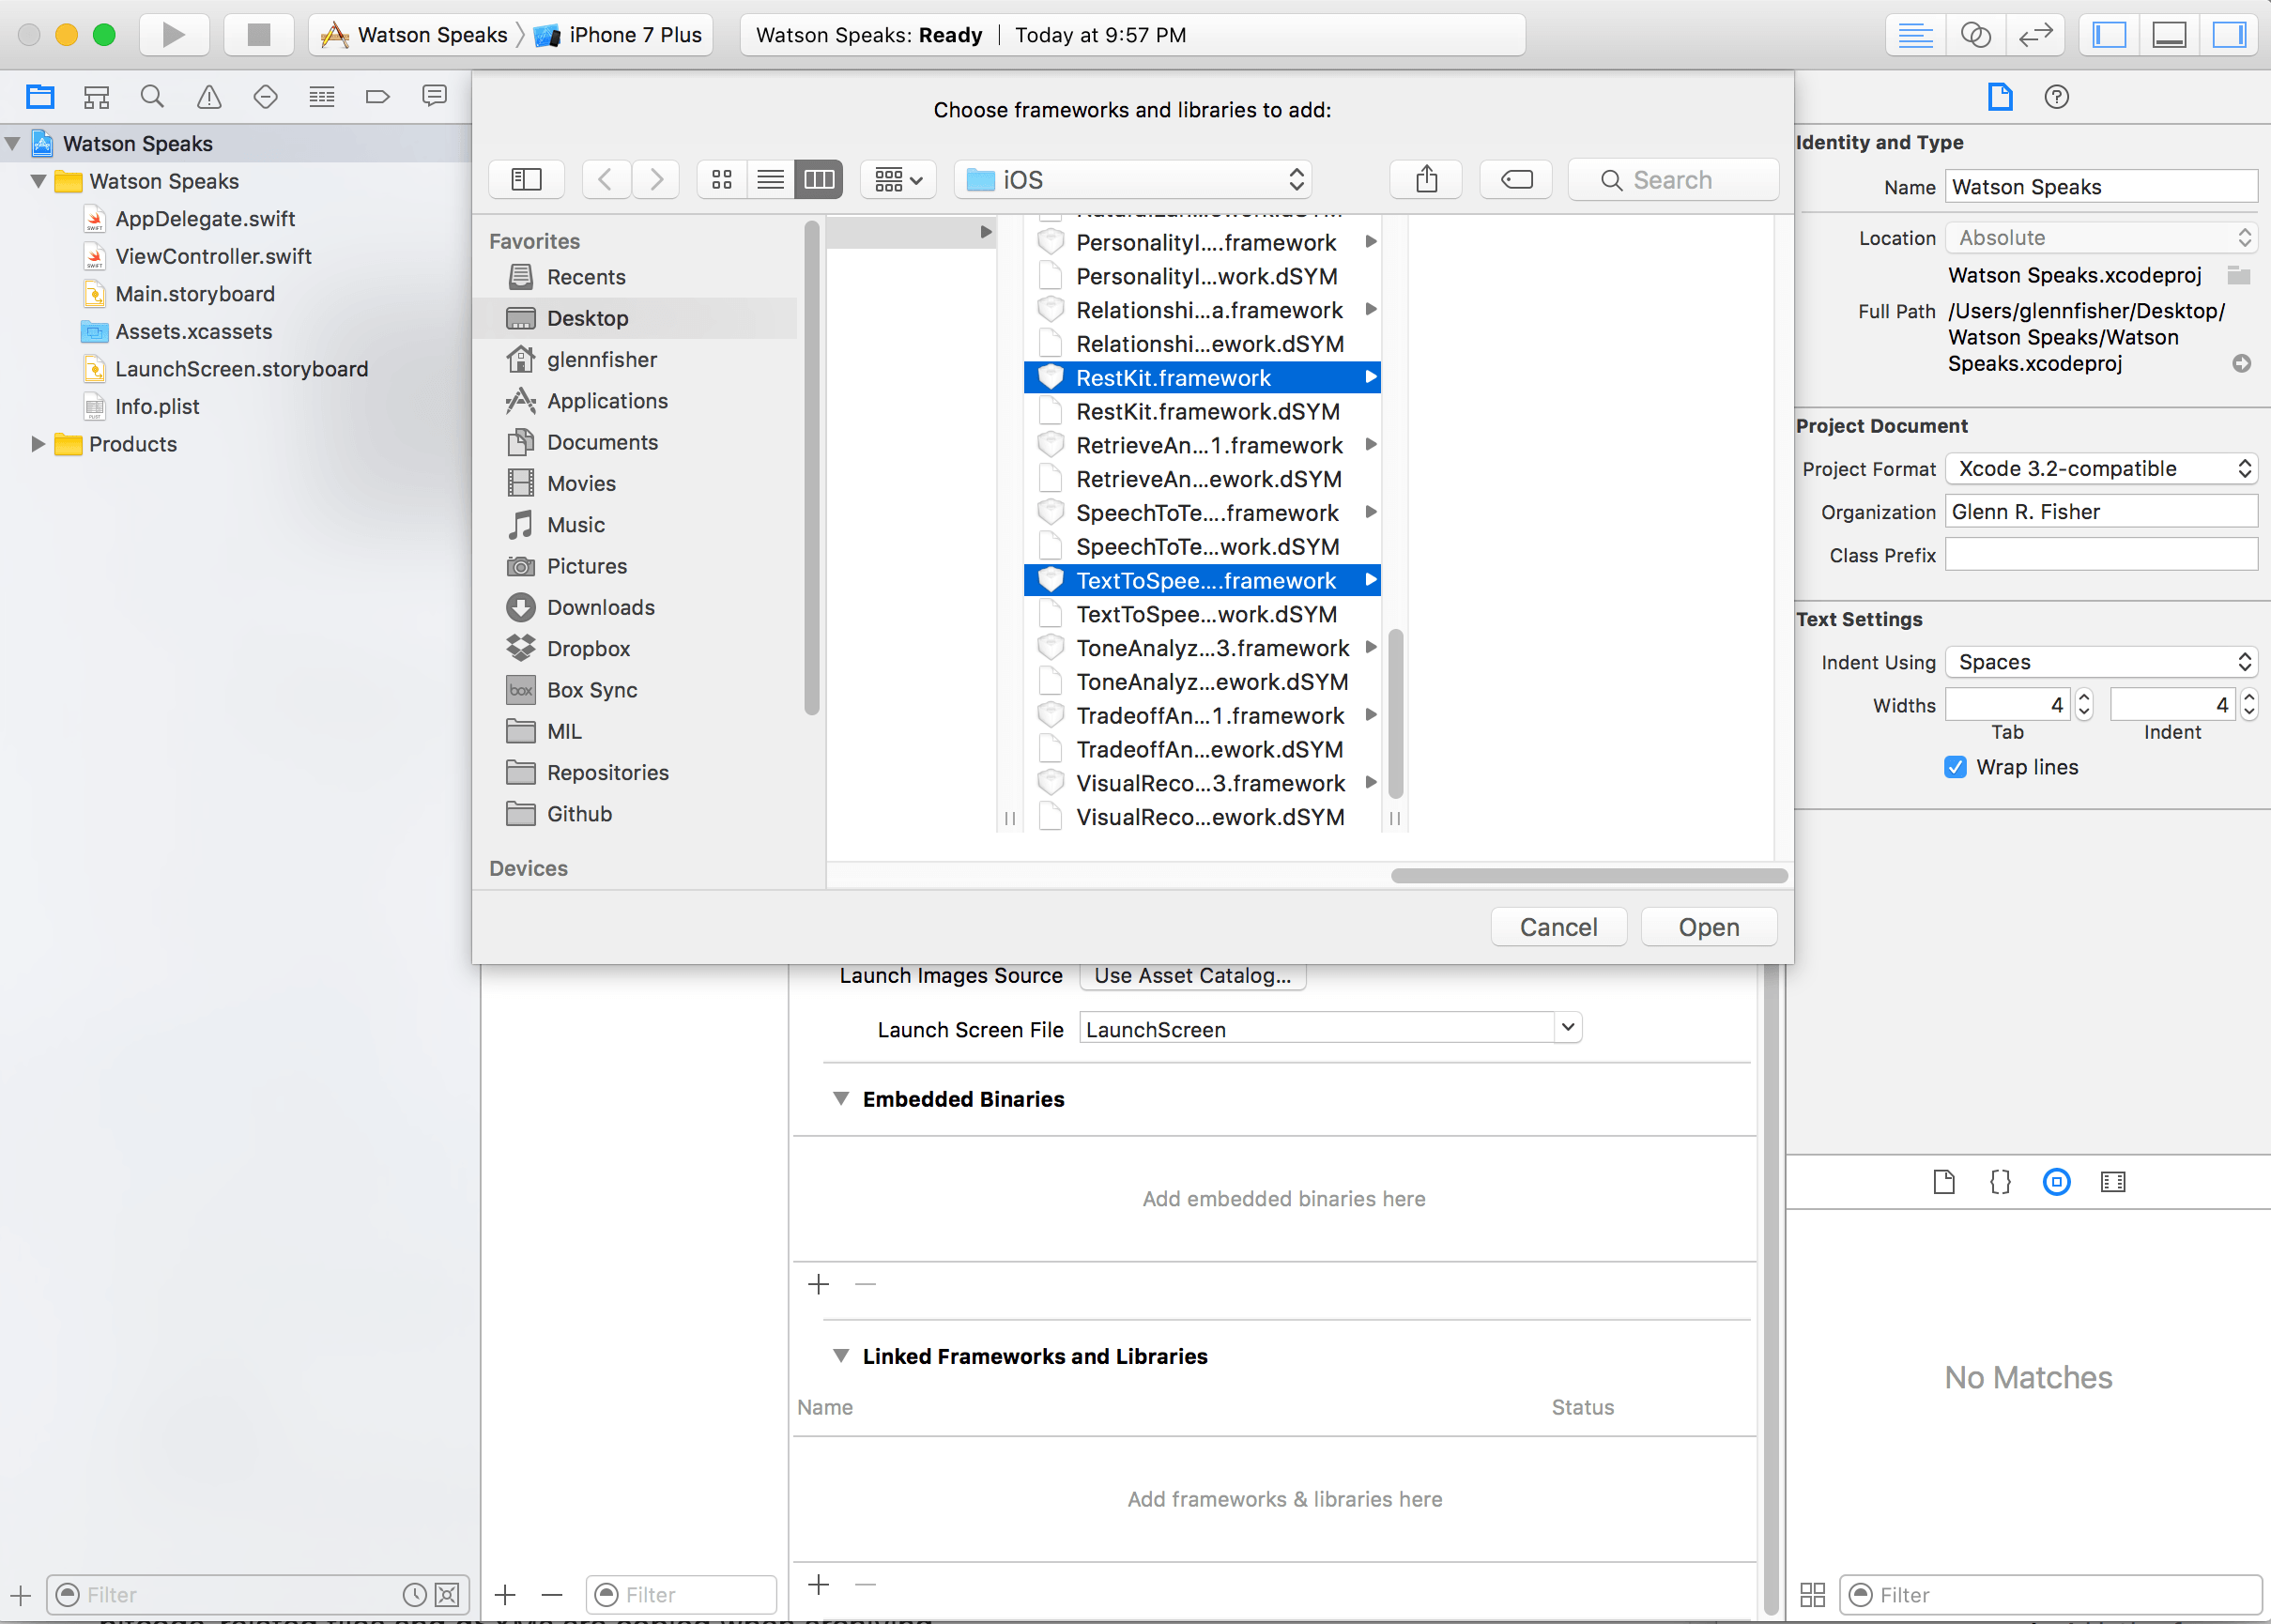
We also need to copy the frameworks into our application to make them accessible at runtime. We will use a Carthage script to copy the frameworks and avoid an App Store submission bug.
-
In Xcode, navigate to your application target’s “Build Phases” settings tab. Then click the
+icon and add a “New Run Script Phase.”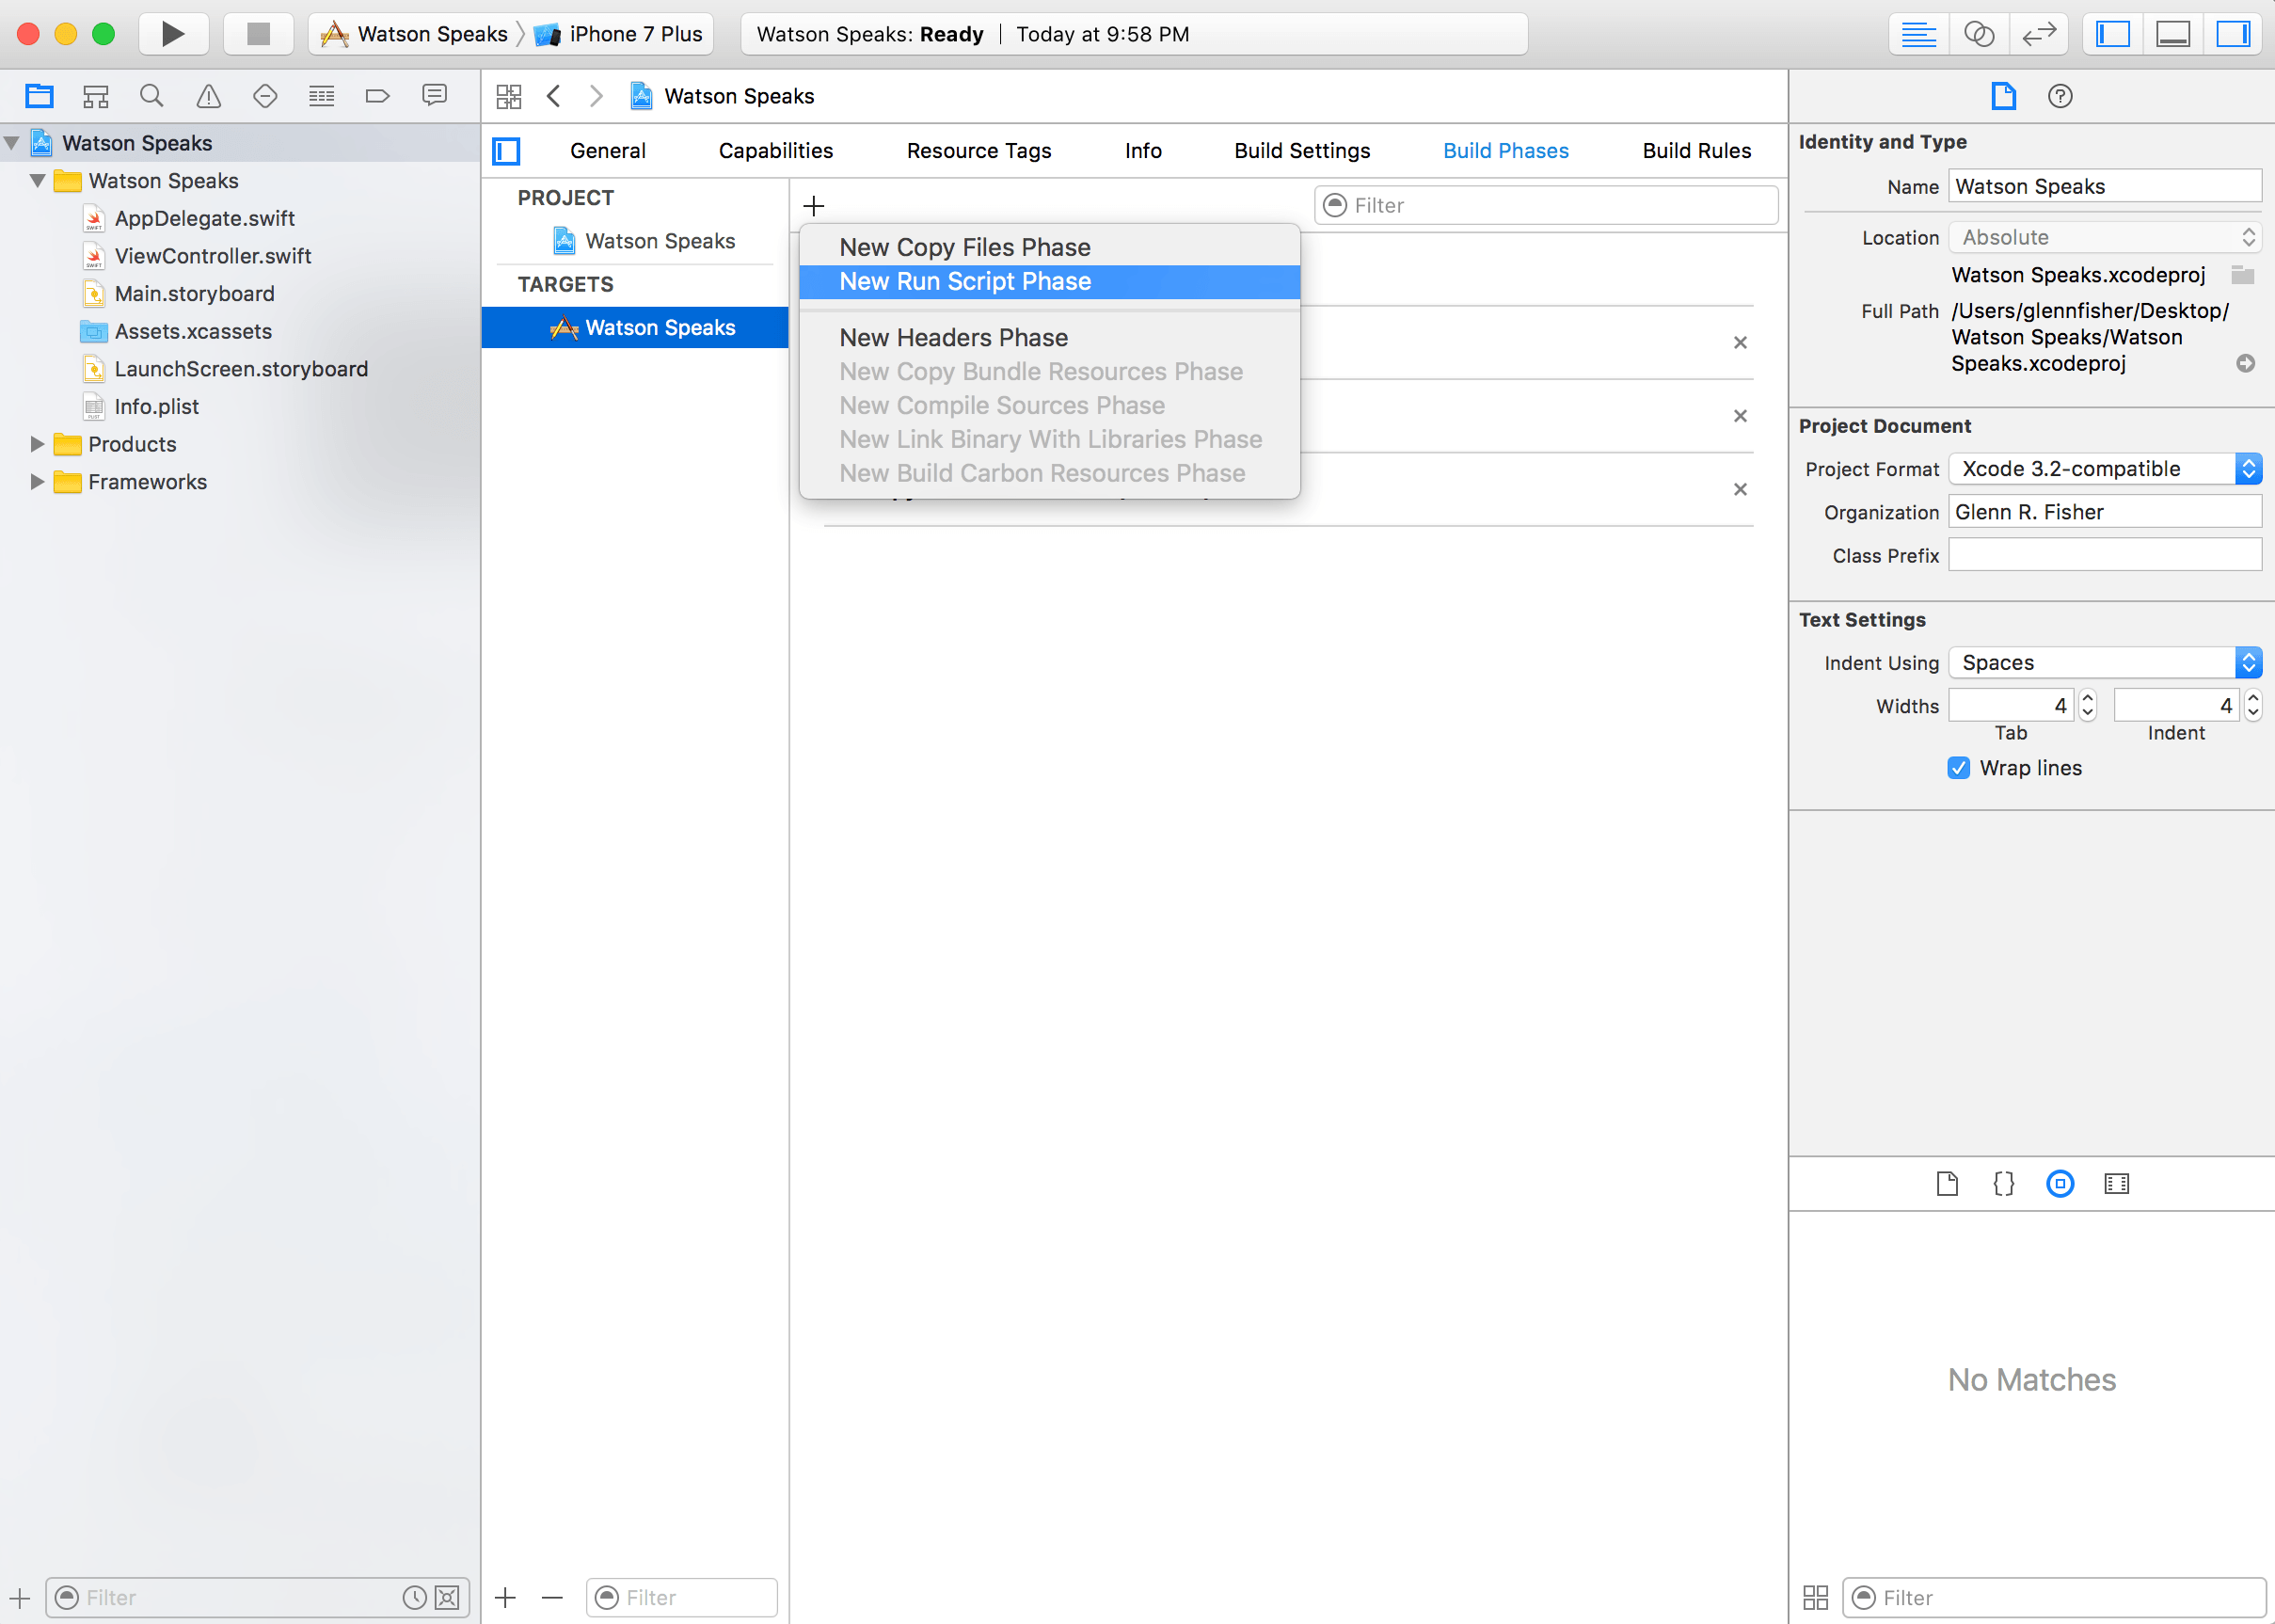
-
Add the following command to the run script phase:
/usr/local/bin/carthage copy-frameworks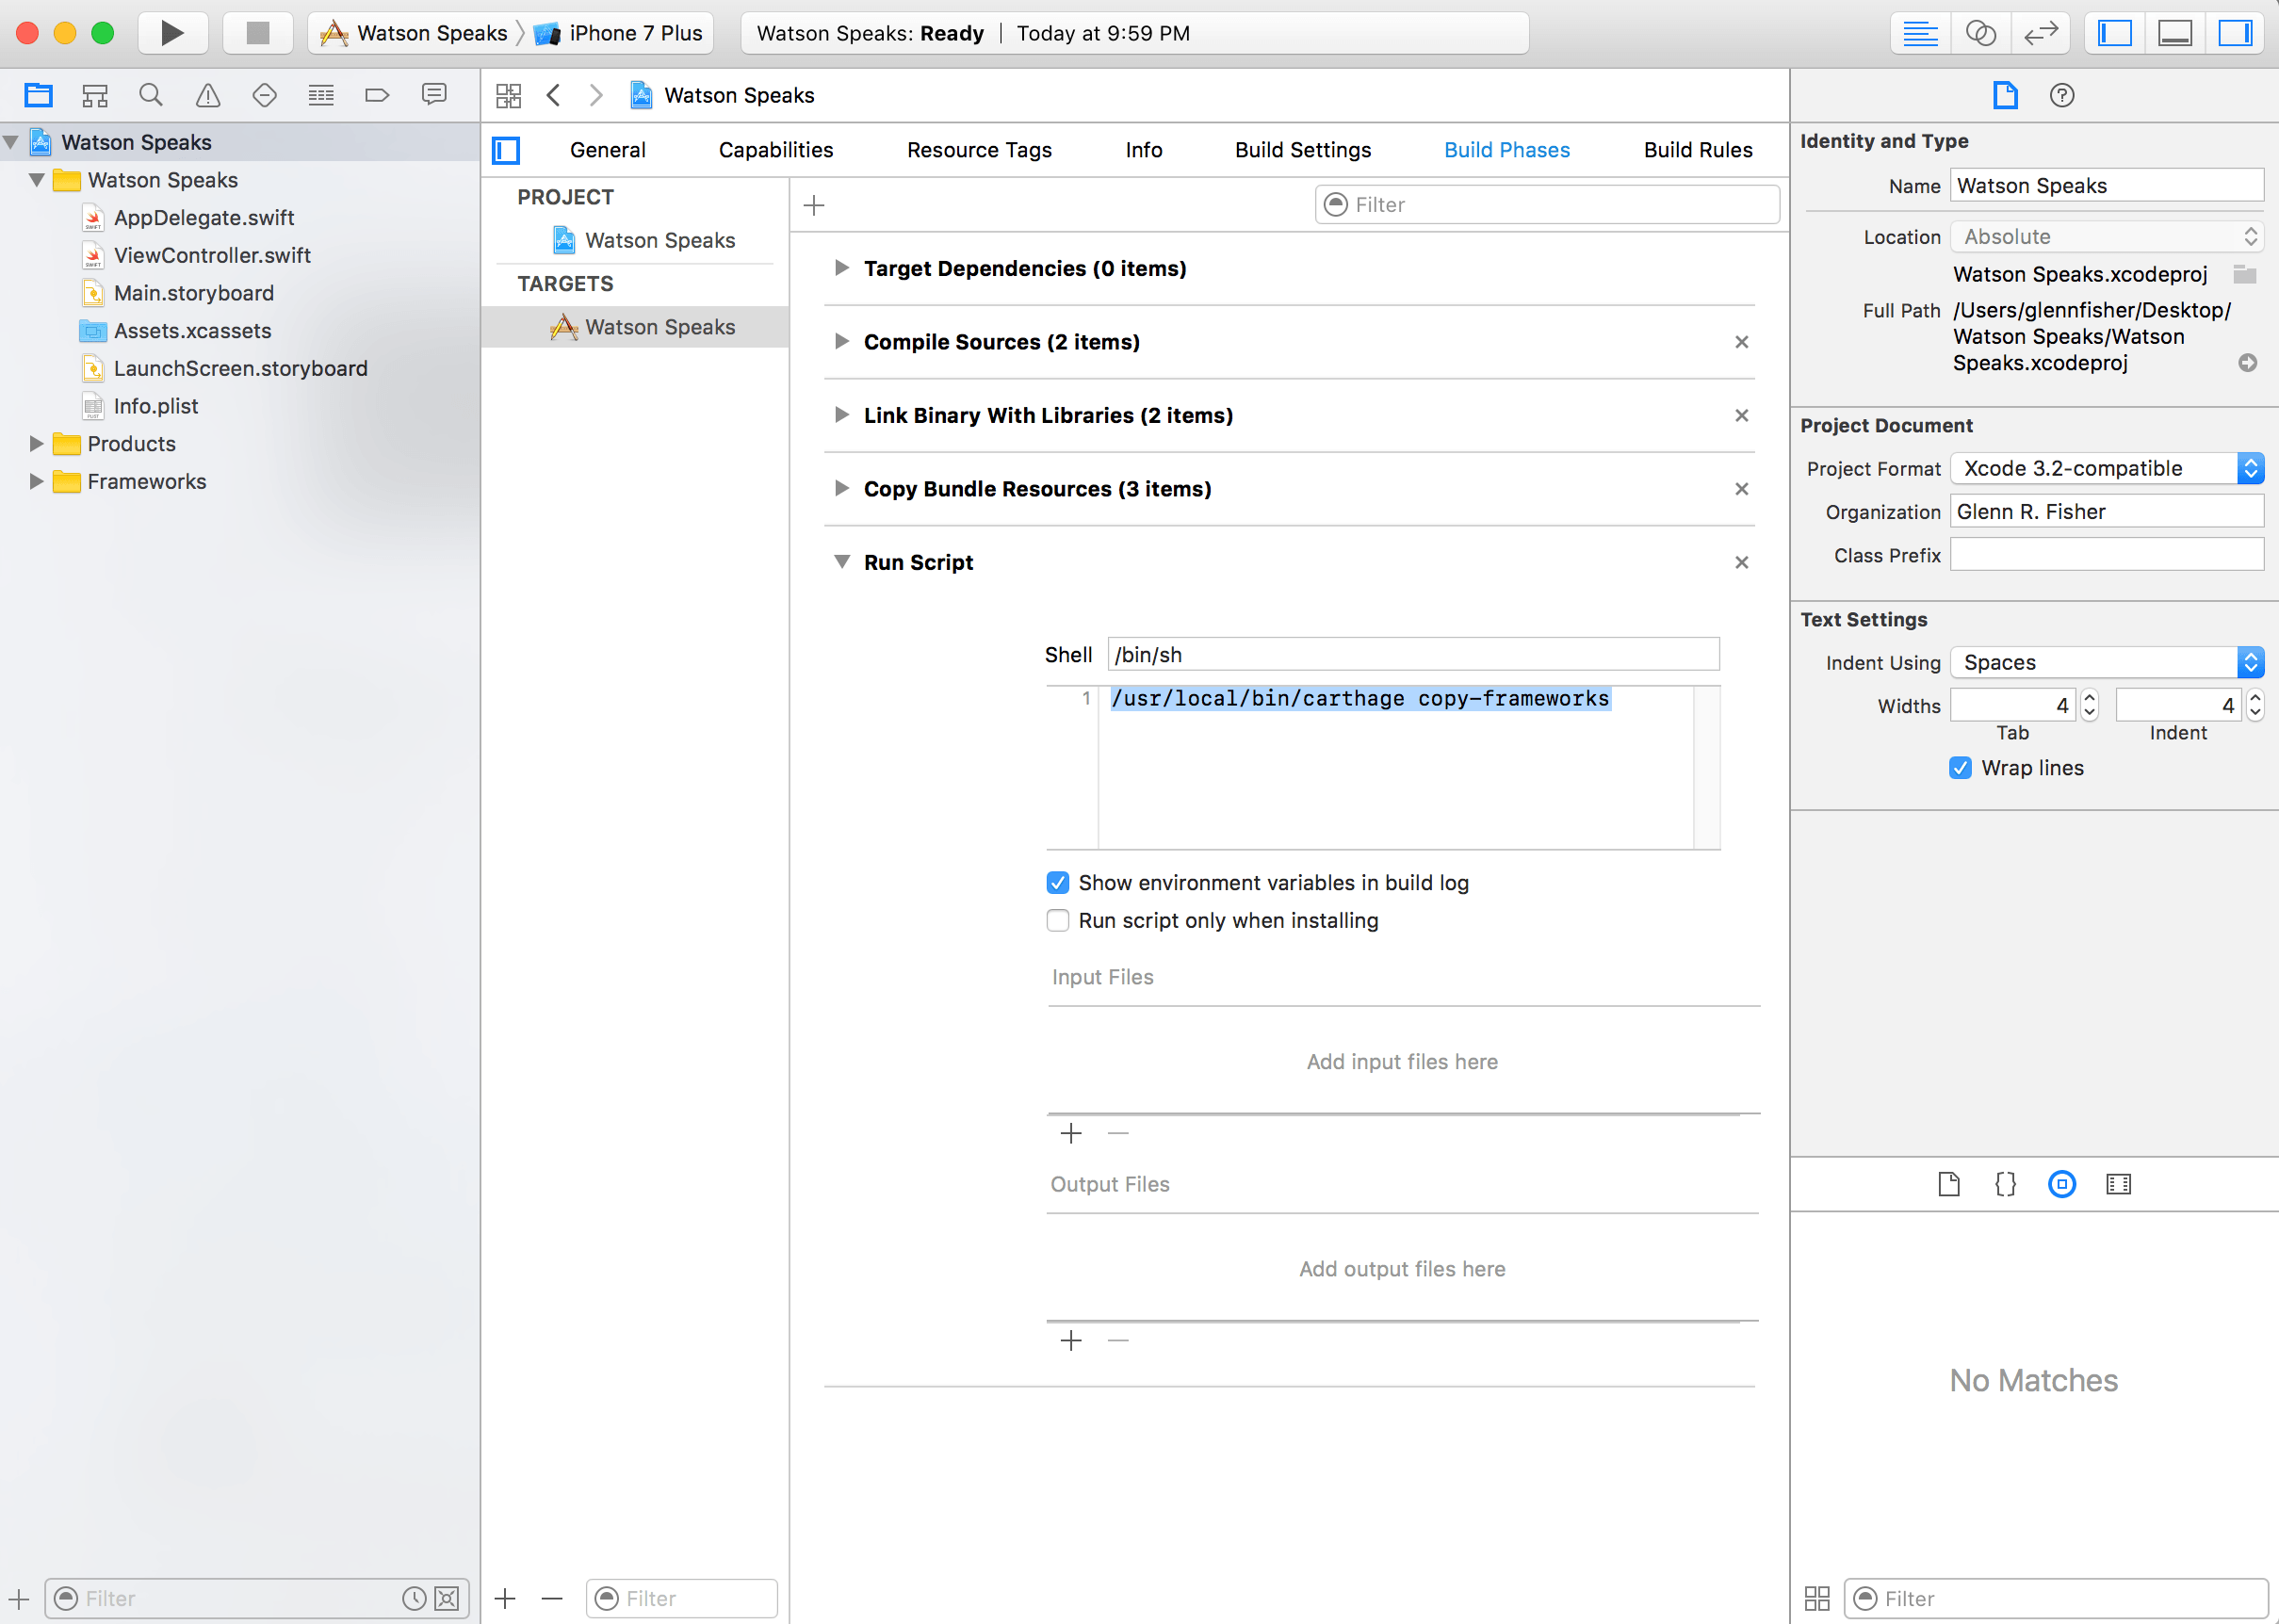
-
Add the frameworks you’d like to use (and the
RestKitframework) to the “Input Files” list:$(SRCROOT)/Carthage/Build/iOS/TextToSpeechV1.framework $(SRCROOT)/Carthage/Build/iOS/RestKit.framework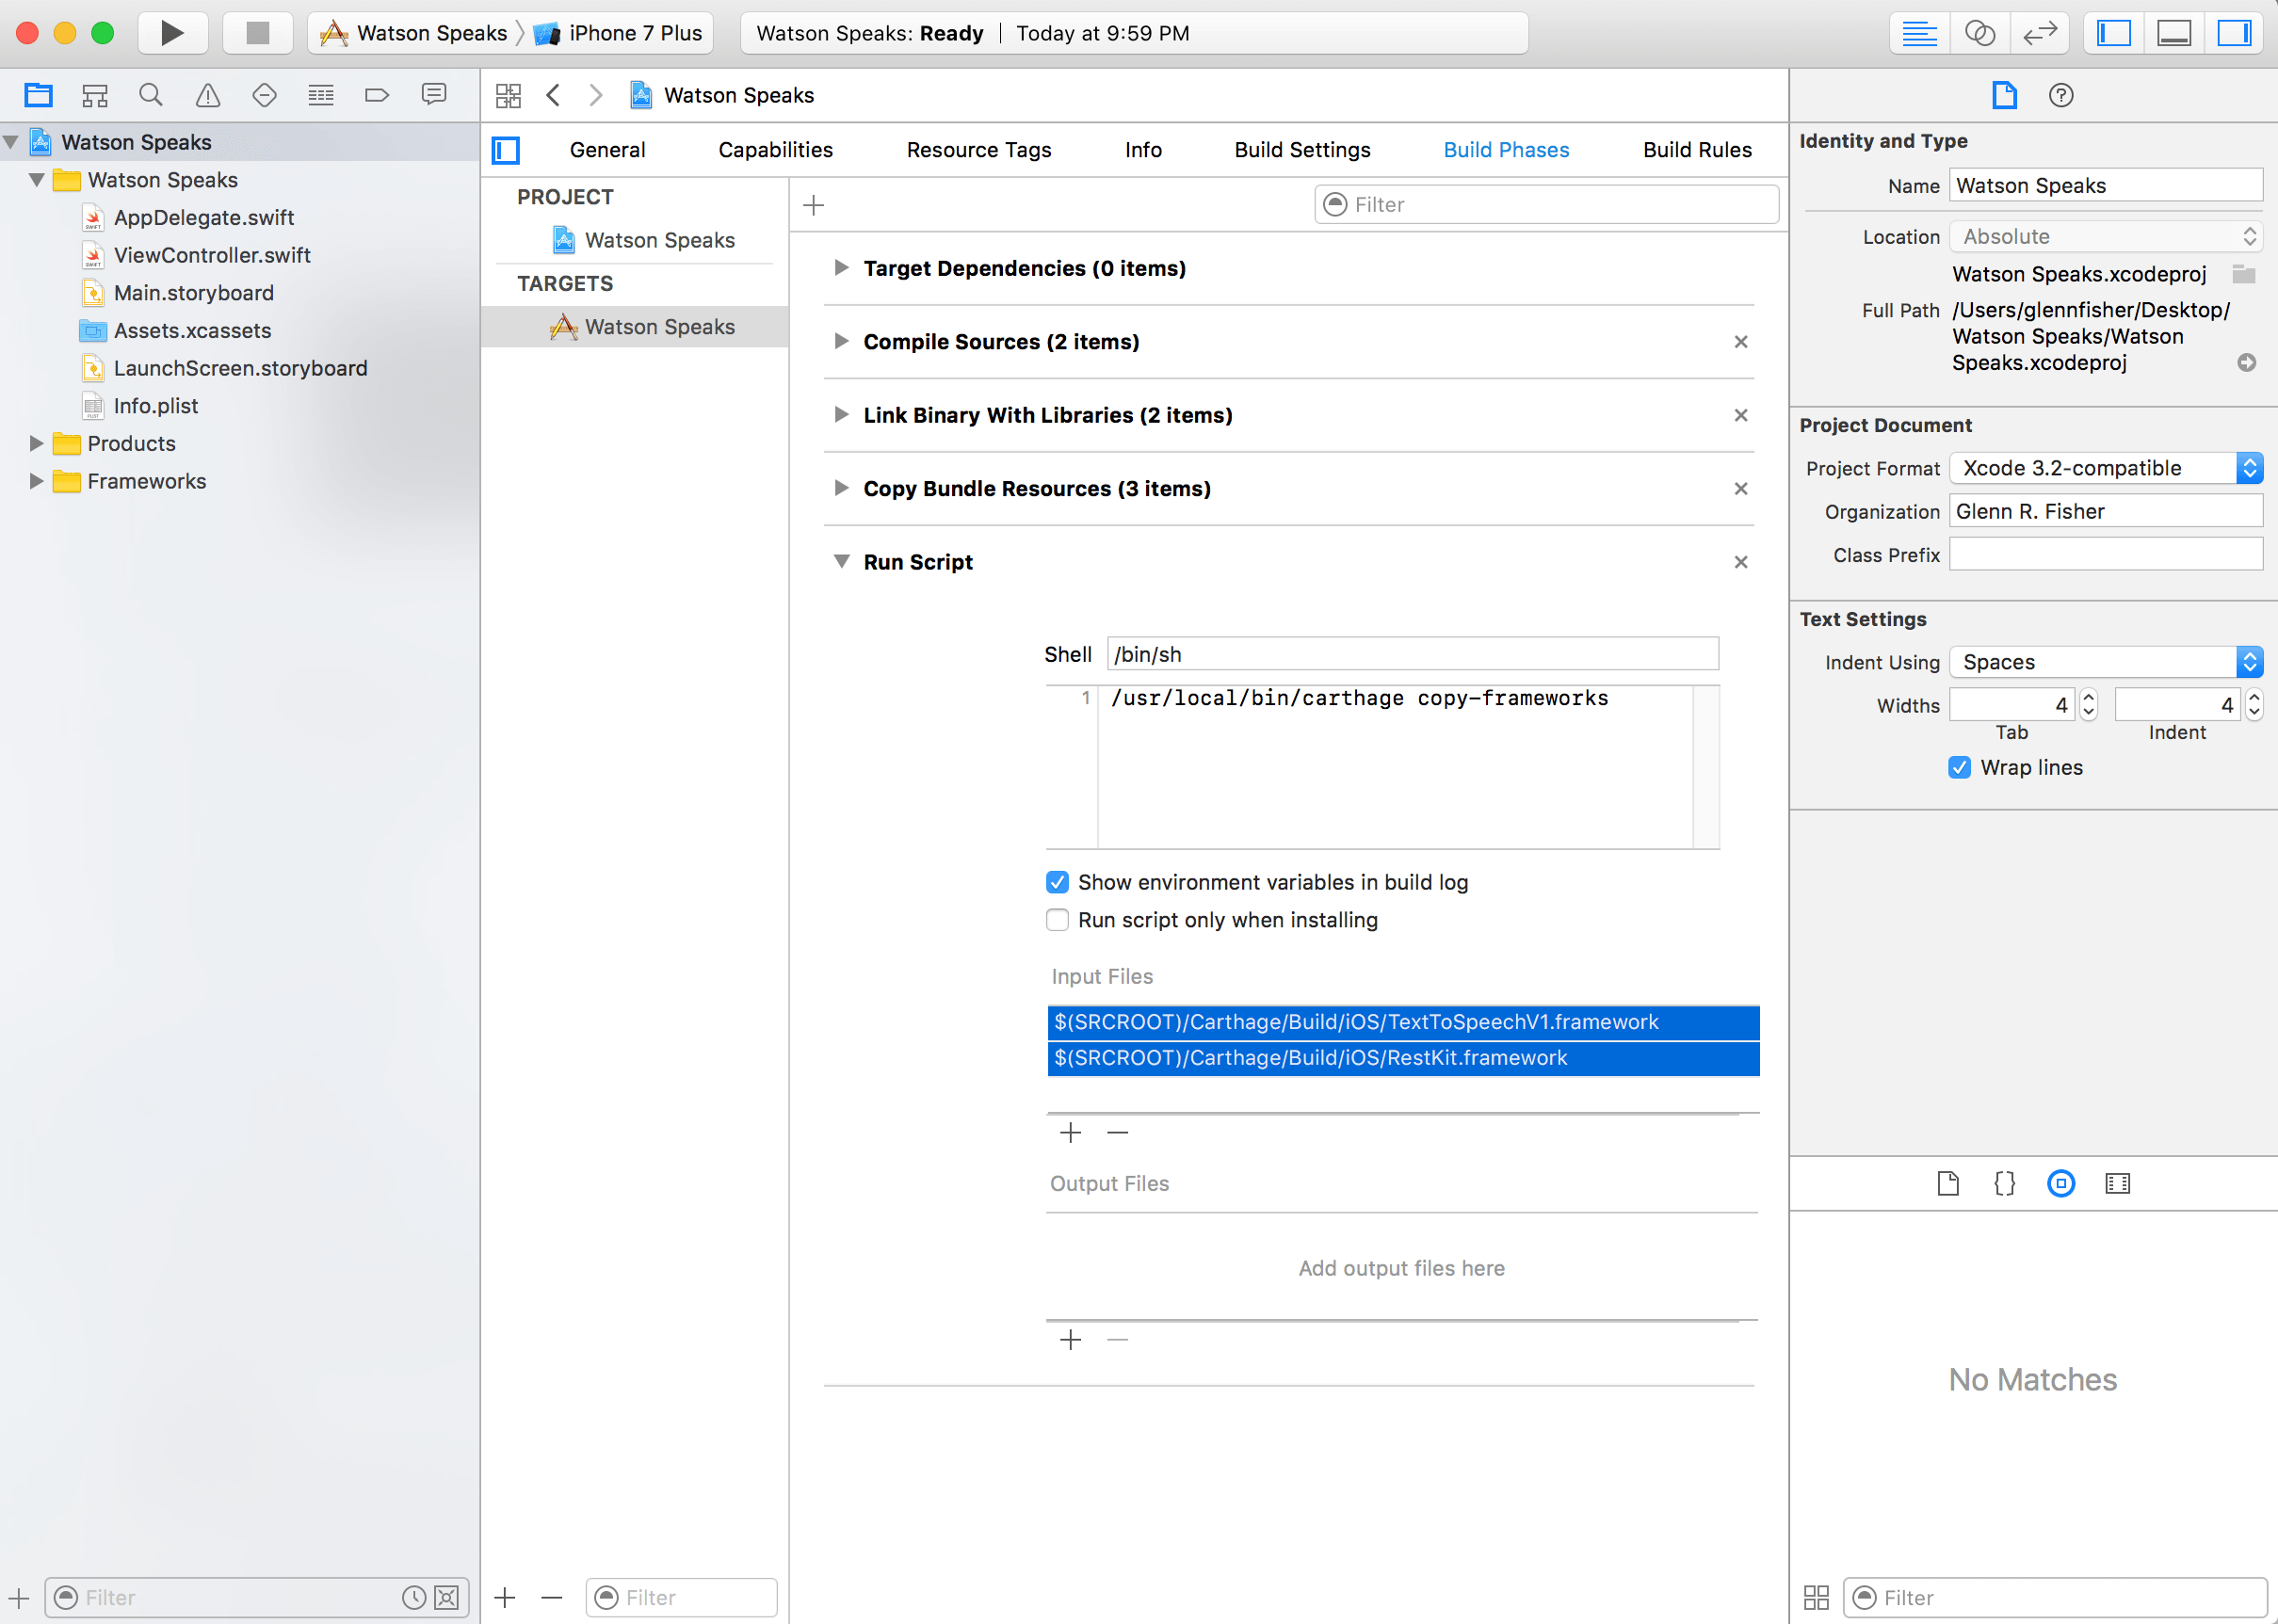
Synthesize with Text to Speech
We will modify our project’s ViewController to synthesize English text with the Text to Speech service.
-
In Xcode, open the
ViewController.swiftfile. -
Add import statements for
TextToSpeechV1andAVFoundation:import TextToSpeechV1 import AVFoundation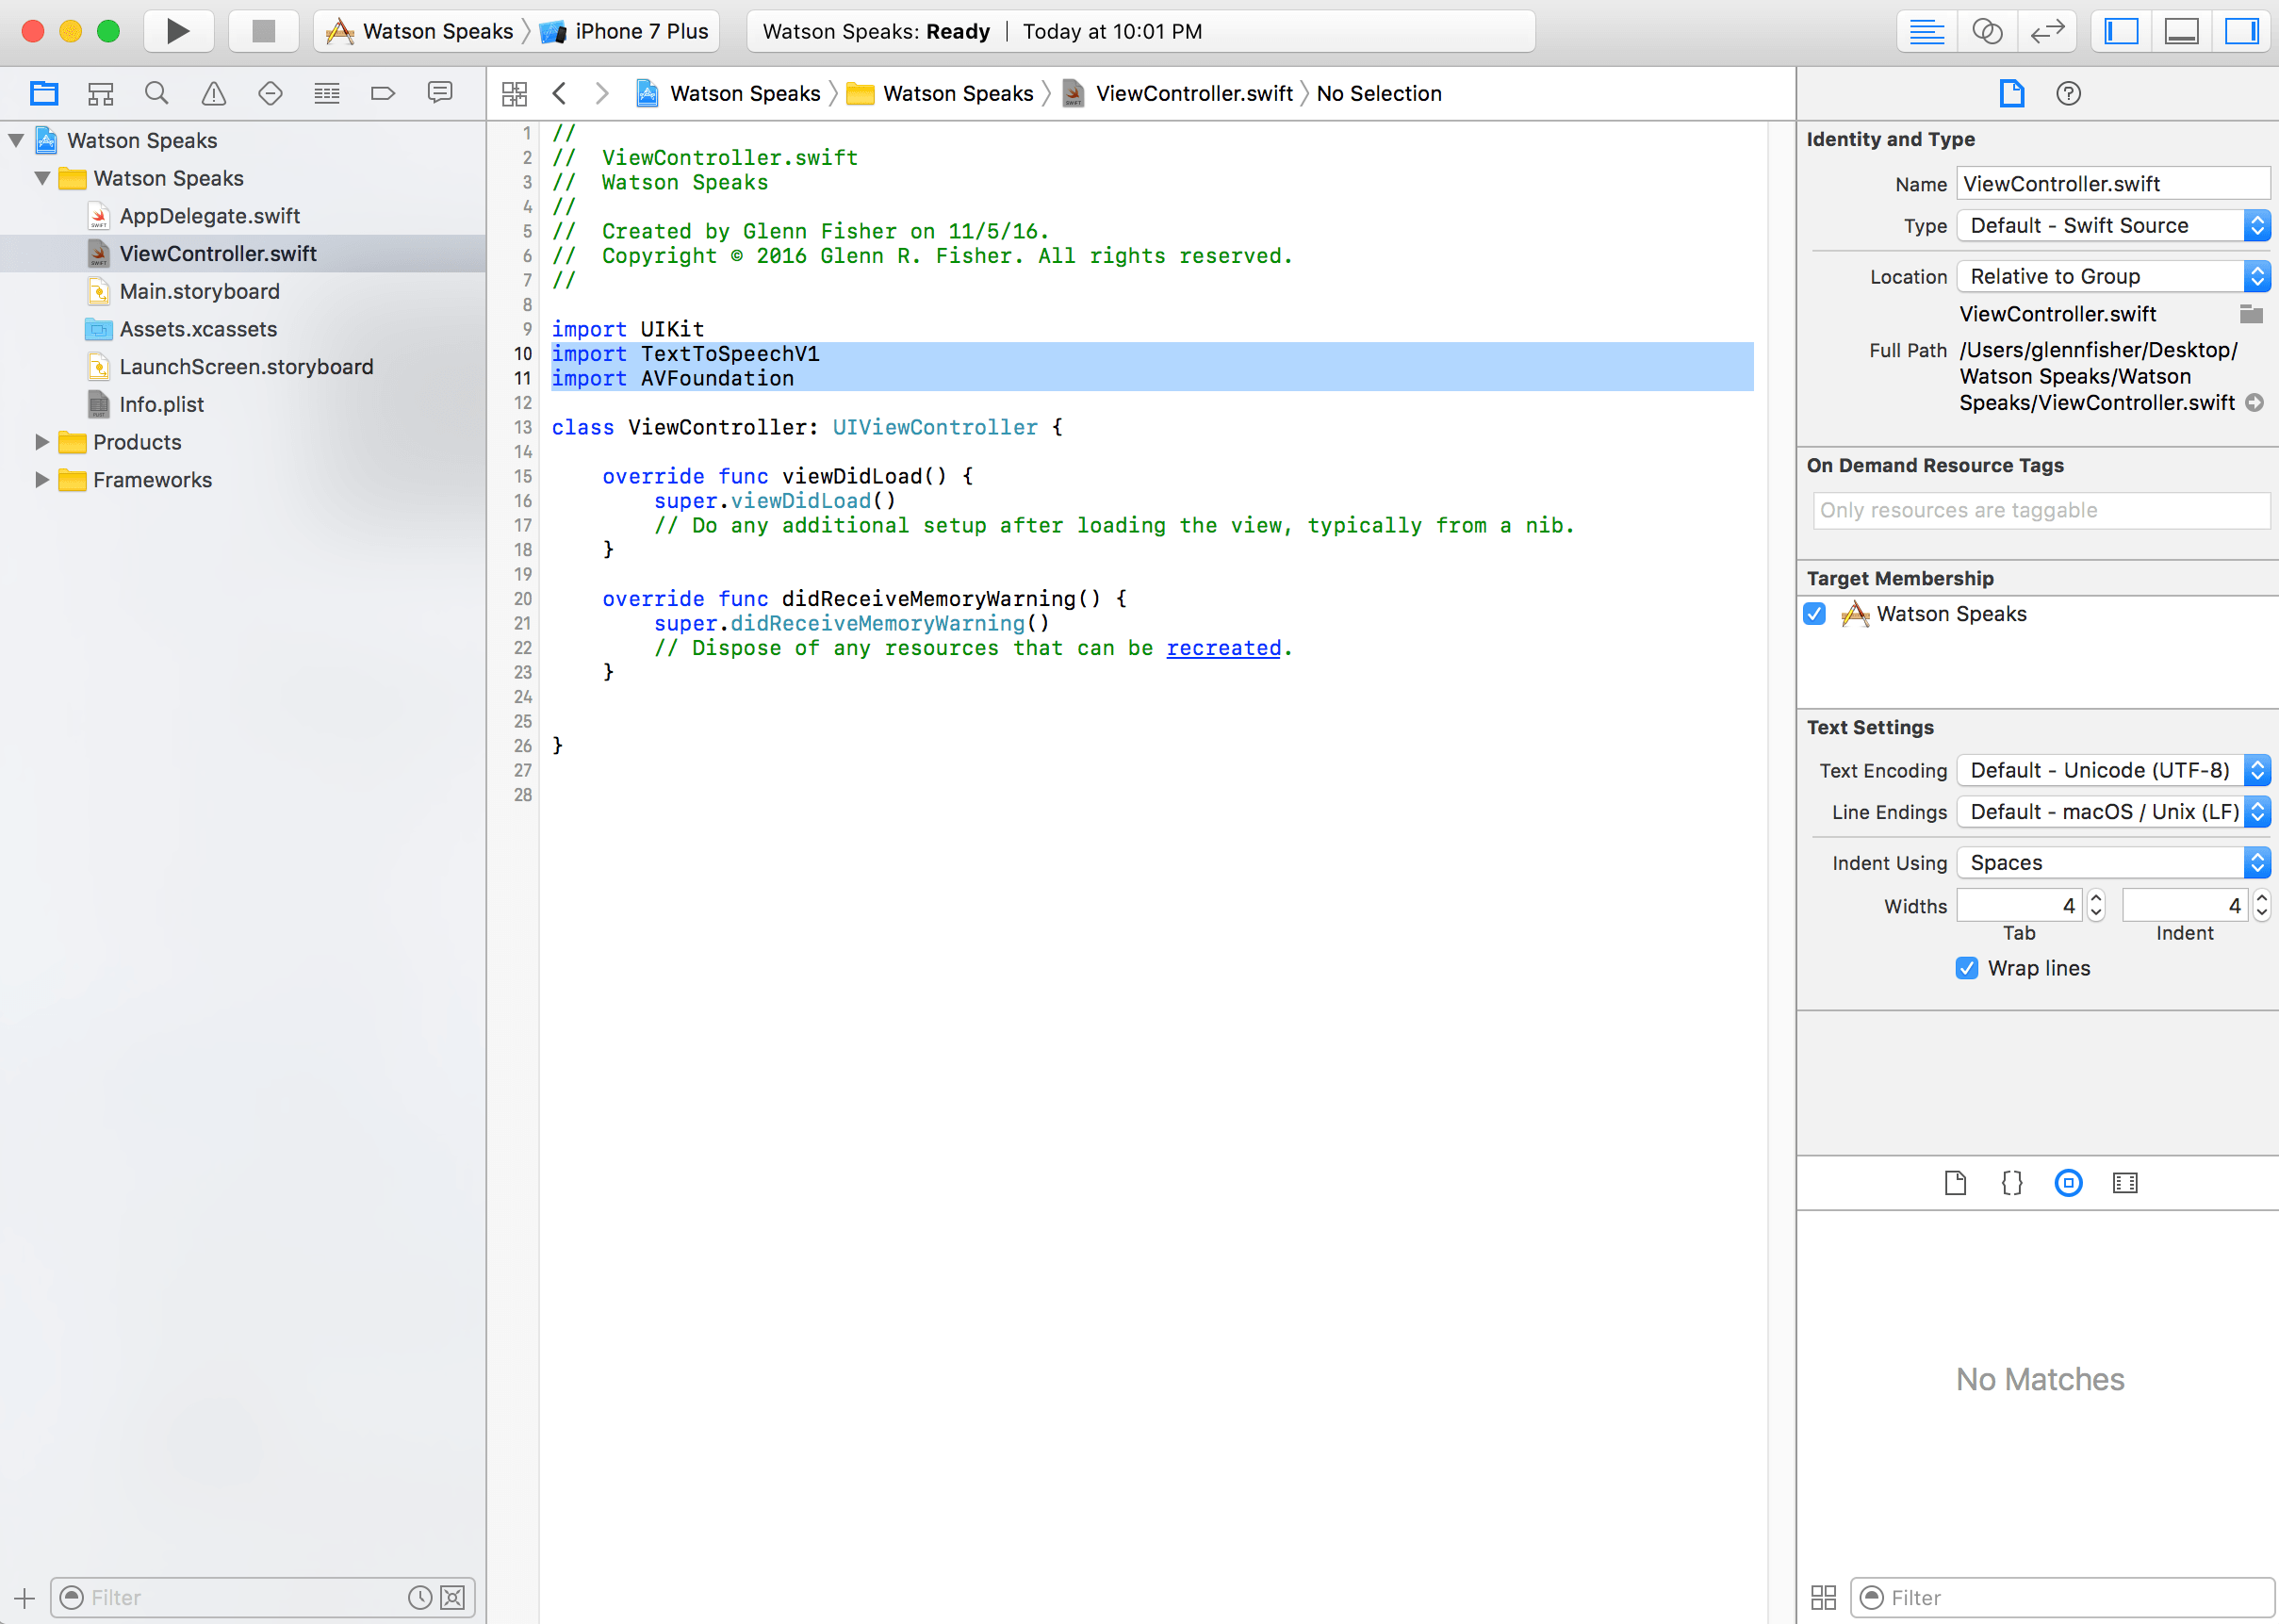
-
Add a
var audioPlayer: AVAudioPlayer!property to theViewControllerclass. This ensures that the audio player does not fall out of scope and end playback when theviewDidLoad()function returns. -
Add the following code to your
viewDidLoadmethod. Be sure to update the username and password with the credentials for your Watson Text to Speech instance.let username = "your-text-to-speech-username" let password = "your-text-to-speech-password" let textToSpeech = TextToSpeech(username: username, password: password) let text = "All the problems of the world could be settled easily if men were only willing to think." let failure = { (error: Error) in print(error) } textToSpeech.synthesize(text, failure: failure) { data in self.audioPlayer = try! AVAudioPlayer(data: data) self.audioPlayer.play() }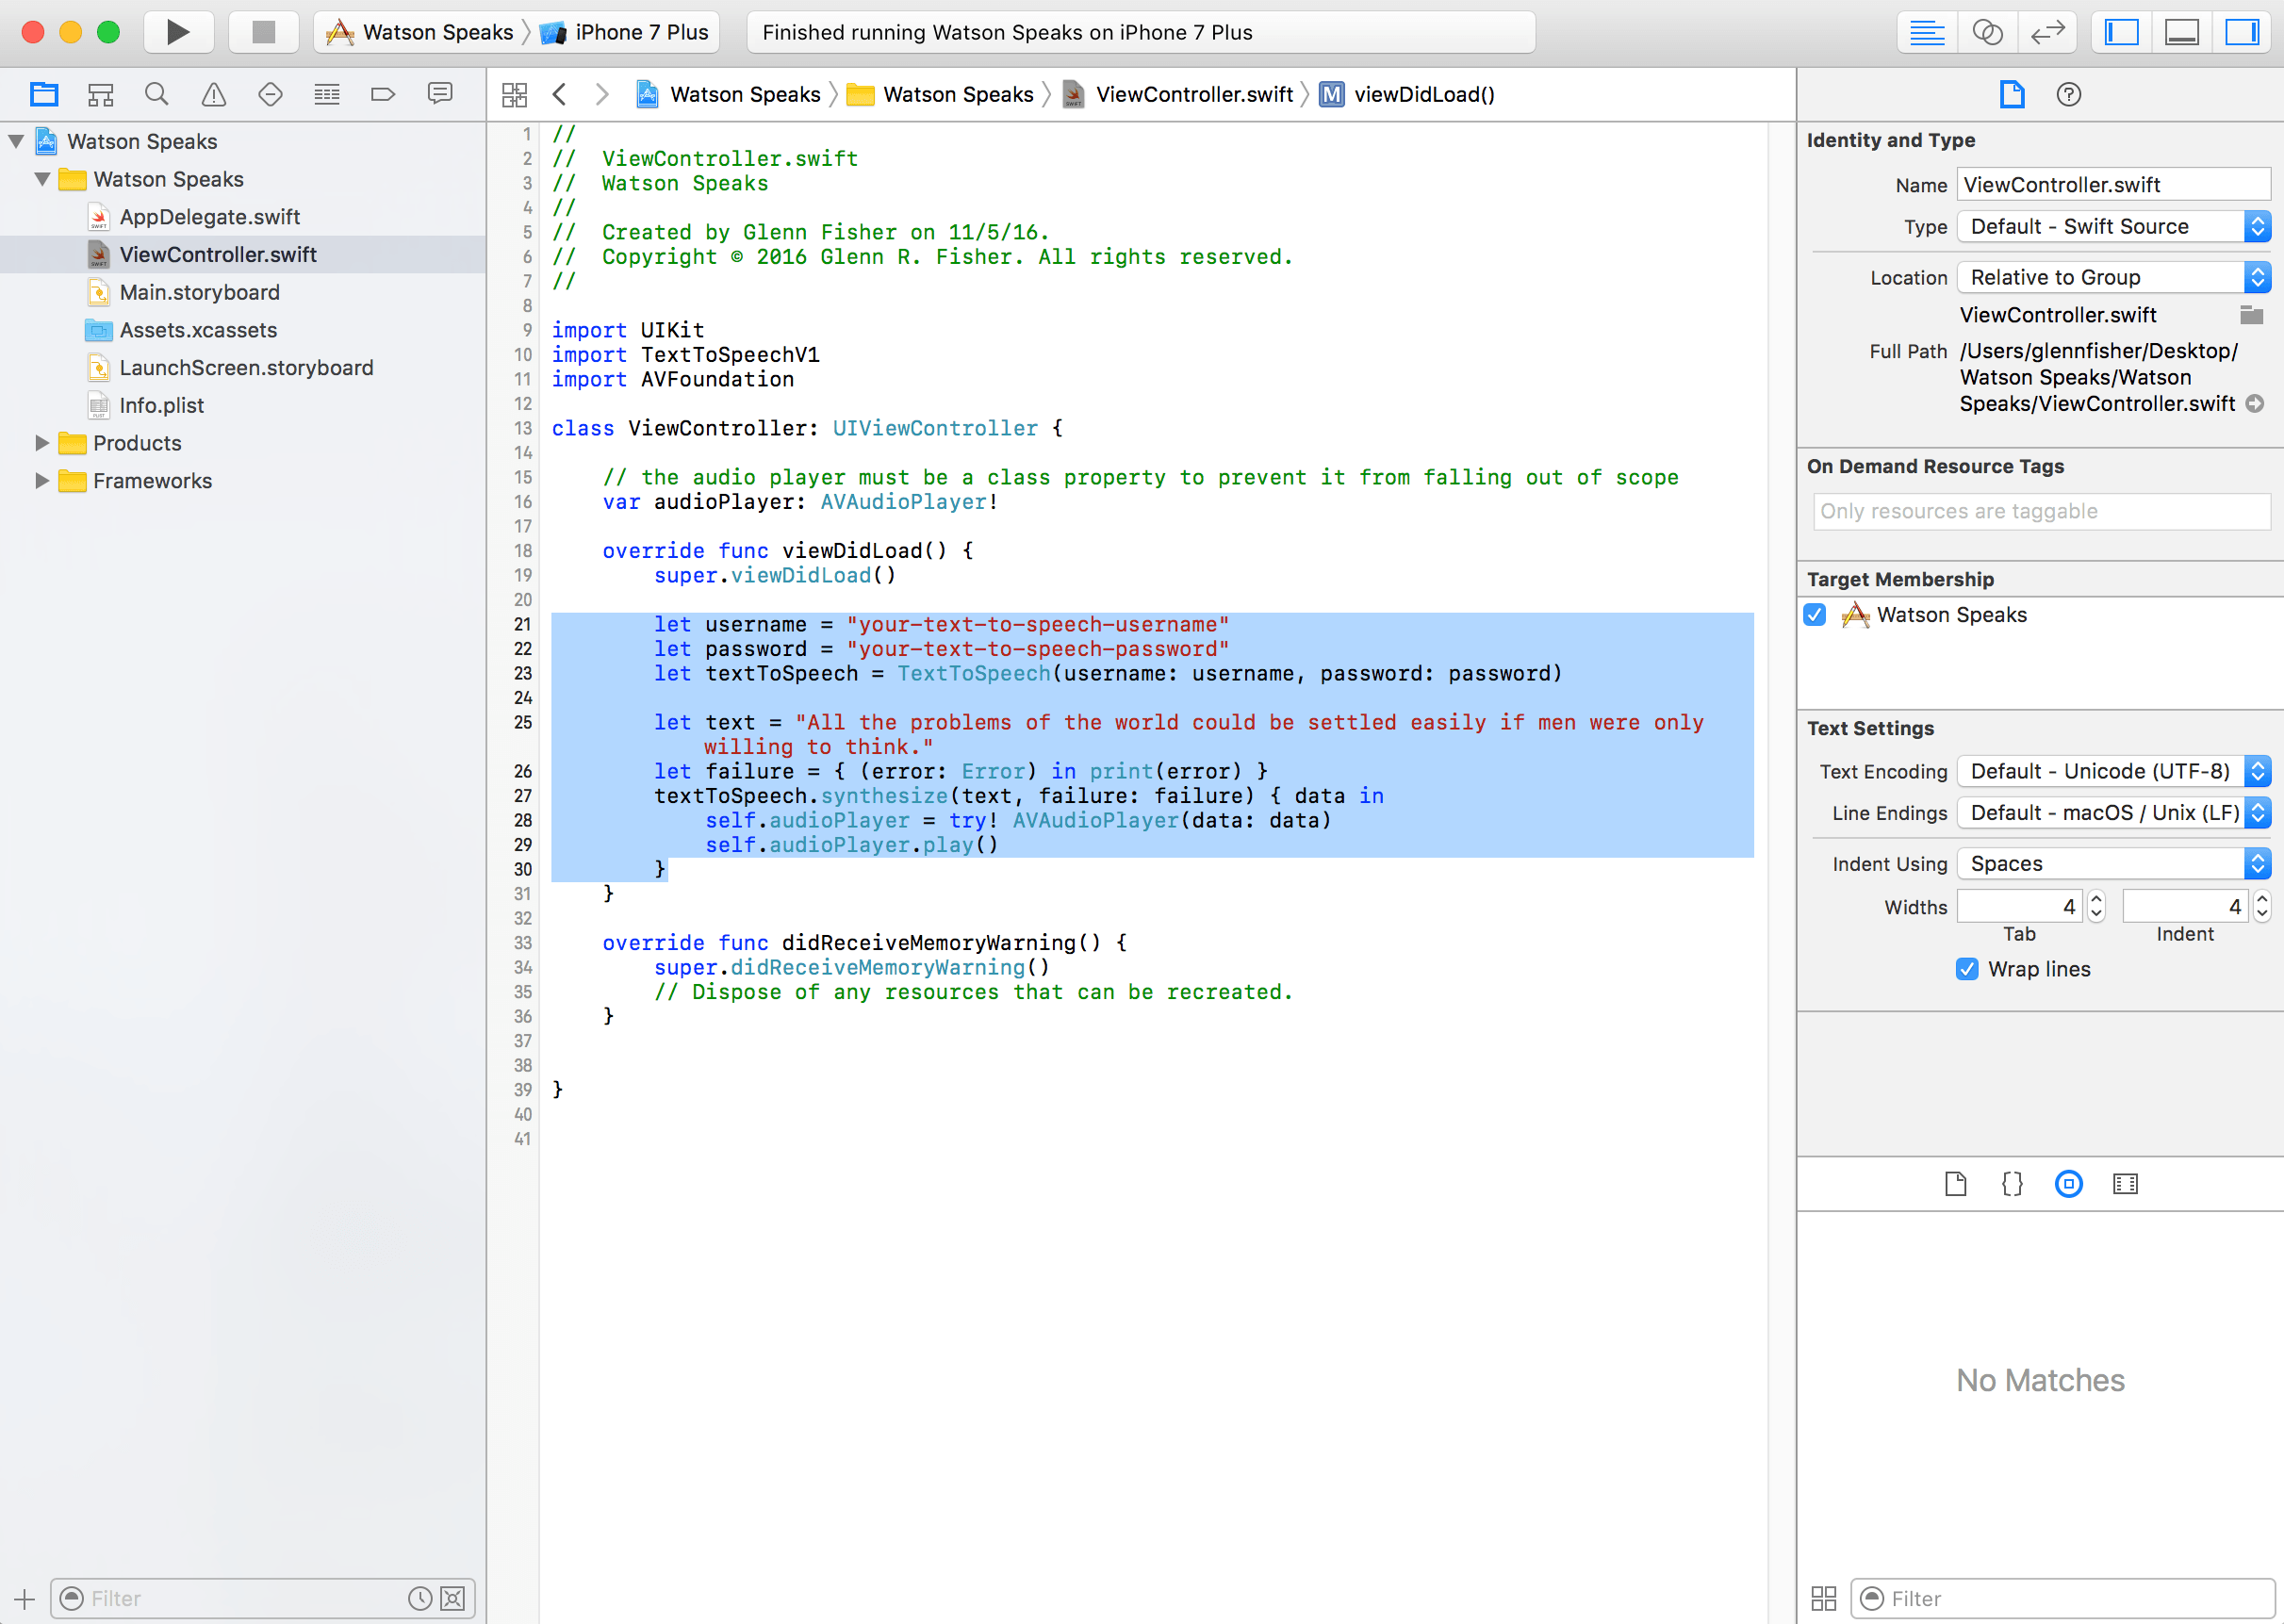
-
Run your application in the simulator to hear the synthesized text!